Transform Complex Workflows with Rendair AI: Select and Modify, Sketch in Context, Remove Objects, and Upscale Tools
We’ve all been there—stuck on a design that just isn’t coming together. But with Rendair AI, you can breathe new life into those unfinished projects and find fresh inspiration. In this guide, I’ll show you how to use Rendair AI’s powerful Image to Render workflow to transform your render into a polished, realistic design. Whether you need to change the season, adjust the lighting, or remove unwanted elements, AI can help you elevate your project in seconds.
Let’s finalize this render together!
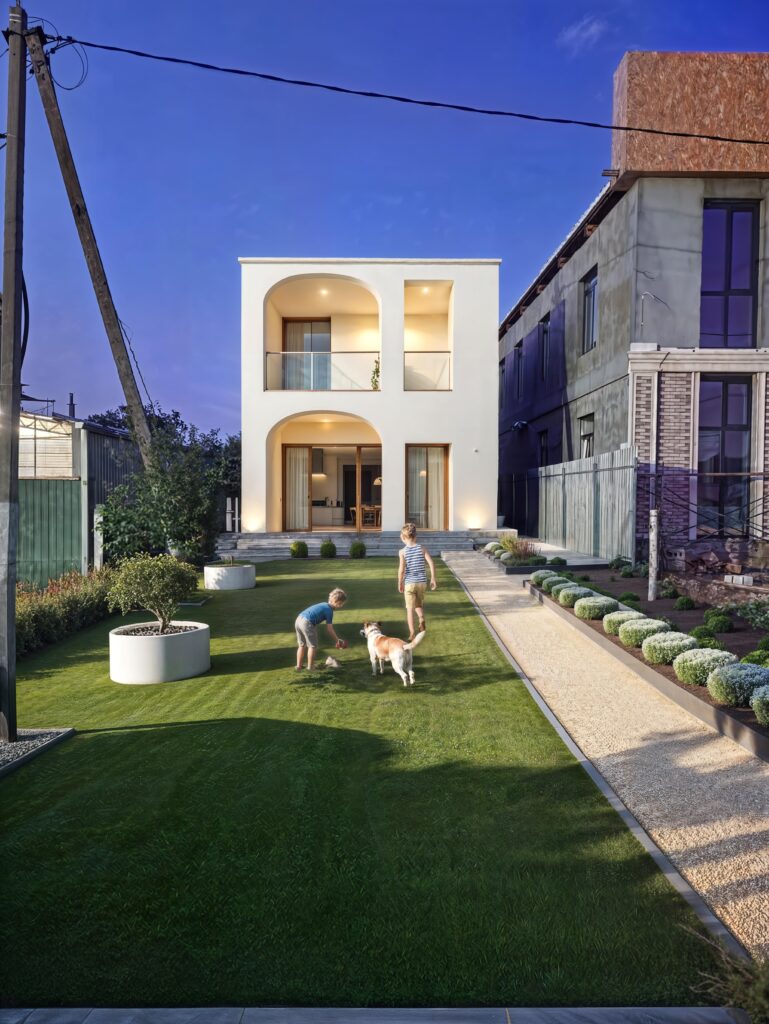
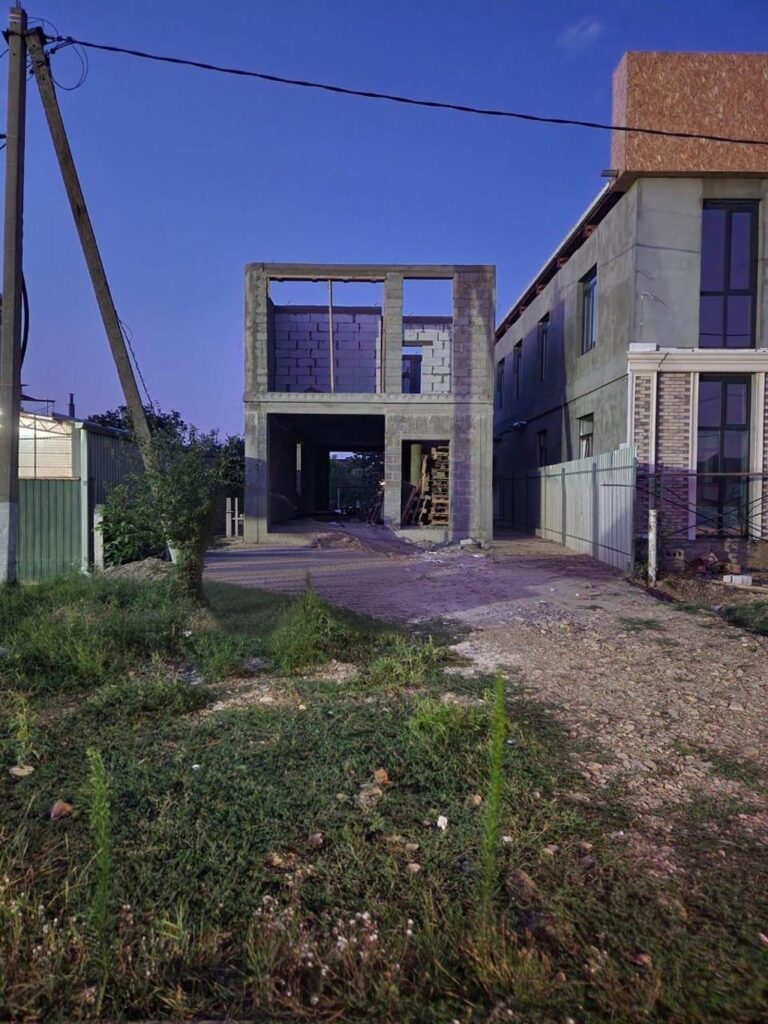
Before vs After


1- Go to Rendair.ai
Start by visiting Rendair.ai, where you’ll find three main sections: Create, Edit, and 4K Upscale.
These sections are organized based on the tasks you can perform. Since we want to start from scratch and make edits, head to the Edit section, where you can make adjustments to renders for post-production.
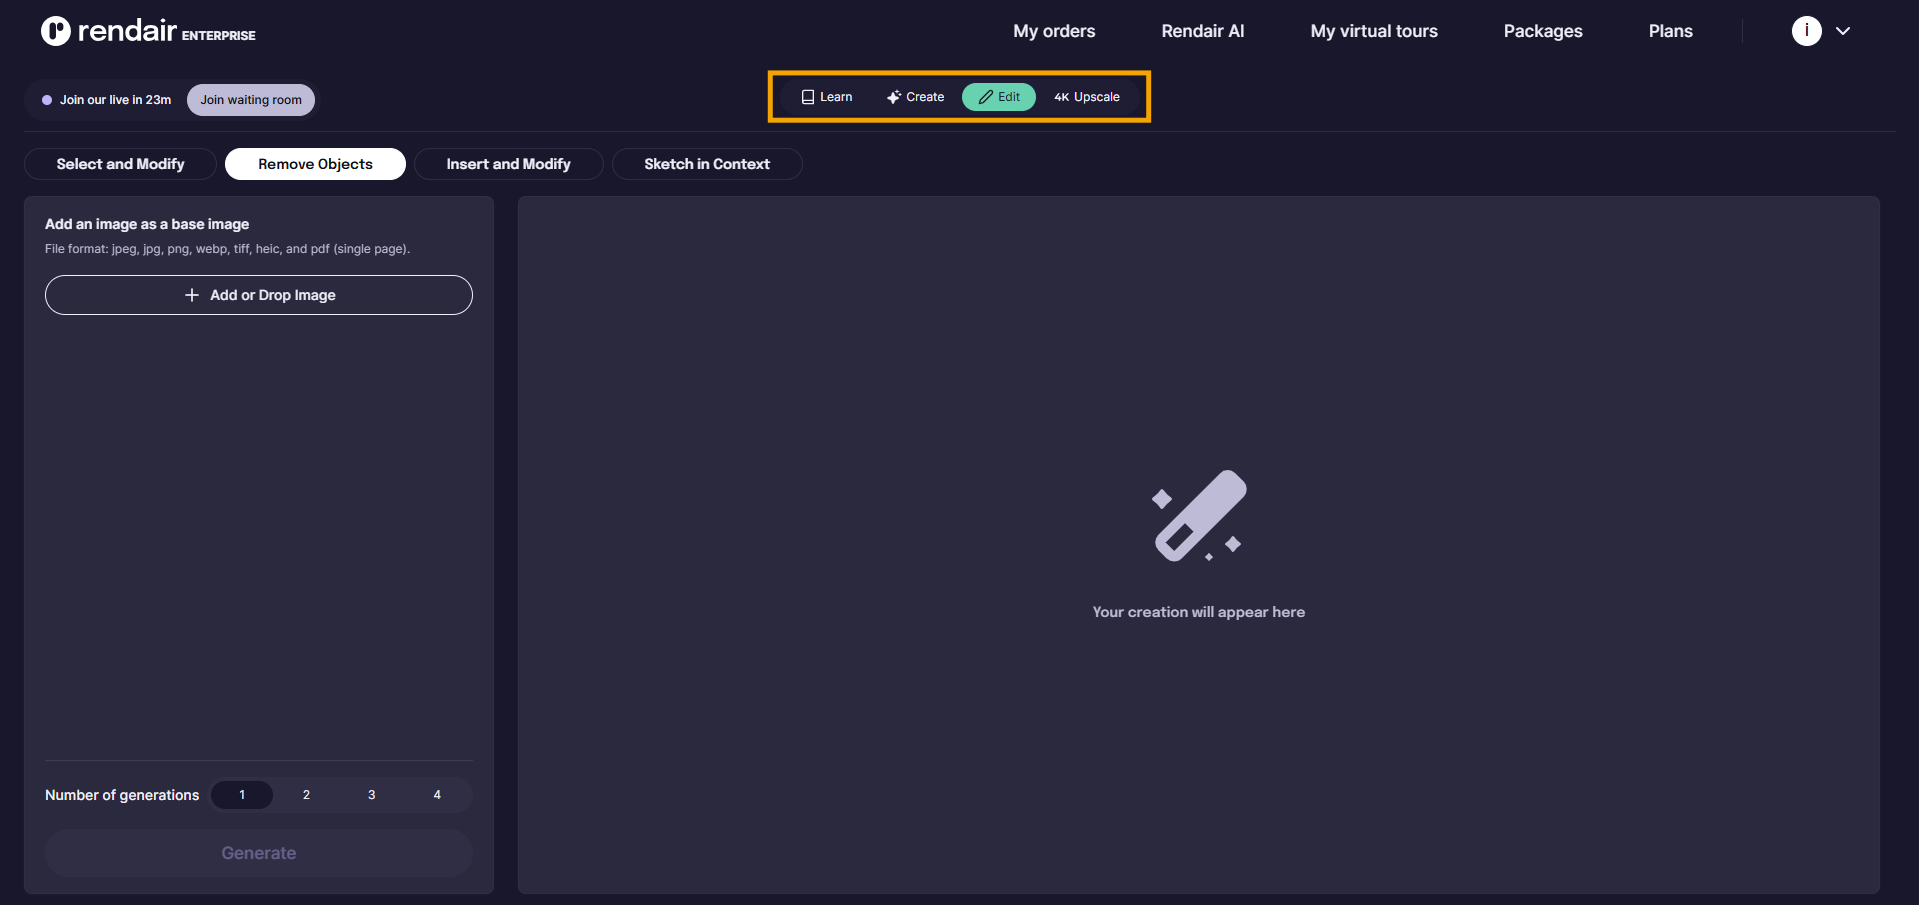
2- Choose Remove Objects
For this example, we’ll start by selecting Remove Objects to remove certain items from the image.
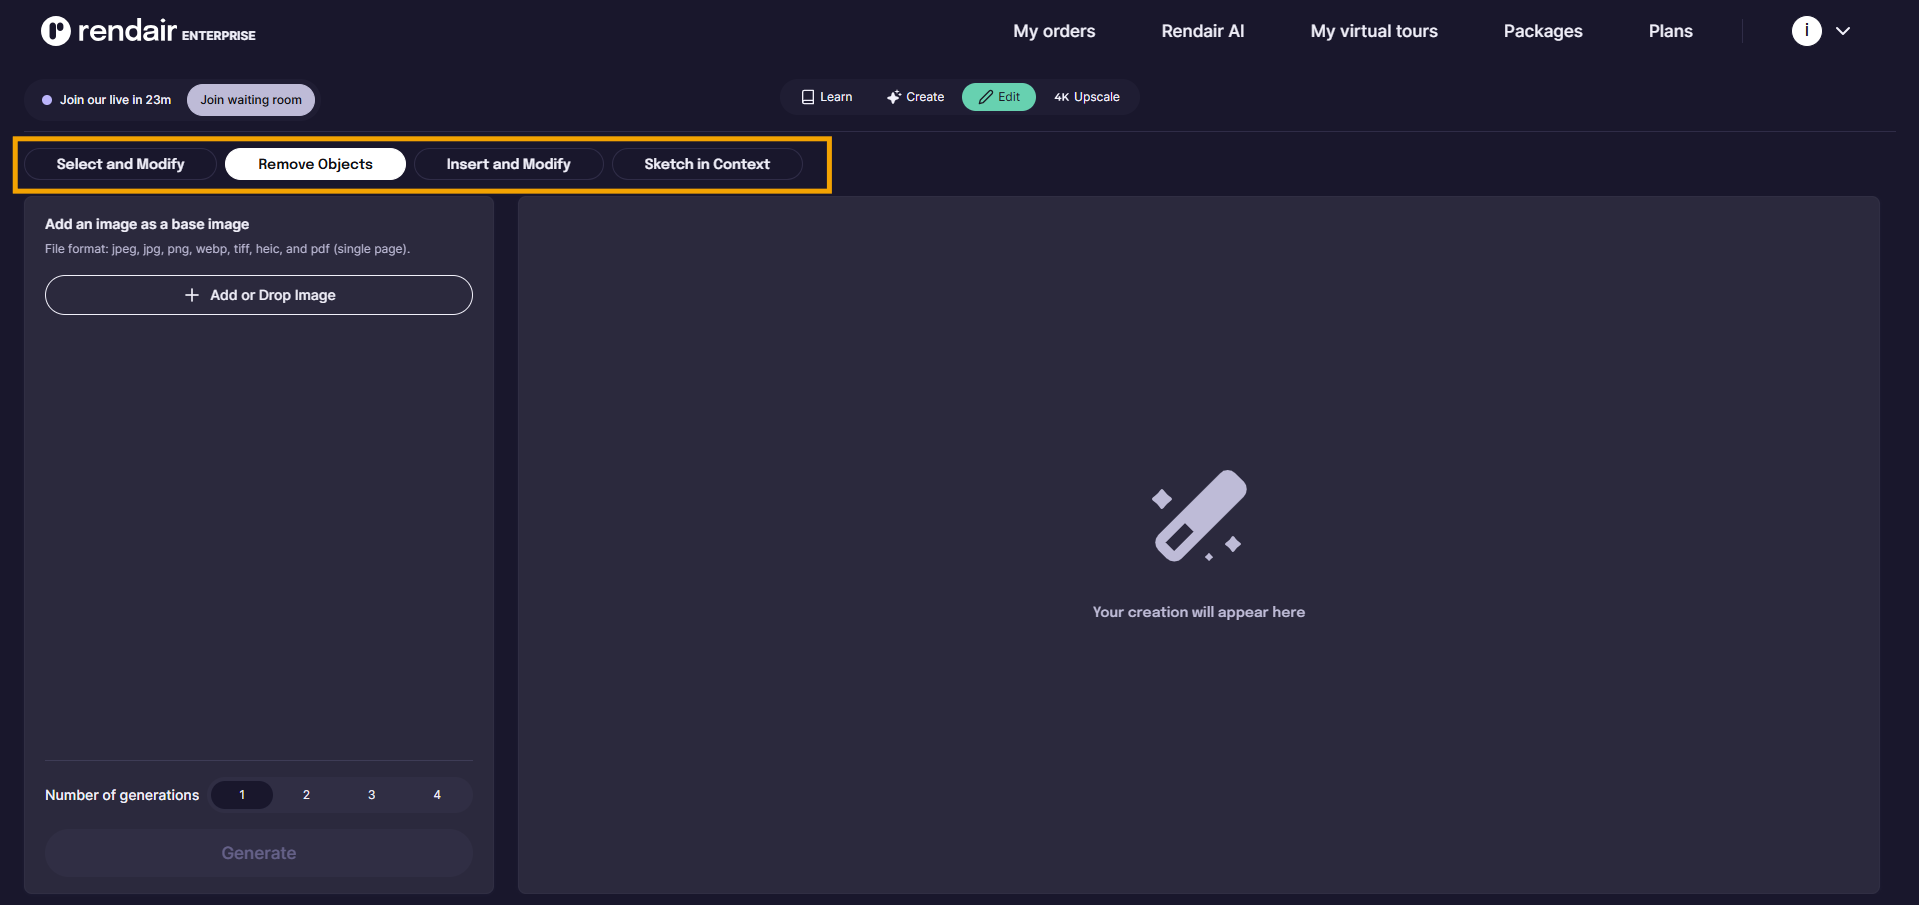
3- Upload the Base Image
Next, upload the image you want to edit. You can drag and drop the image onto the website or click +Add Image to upload it manually.
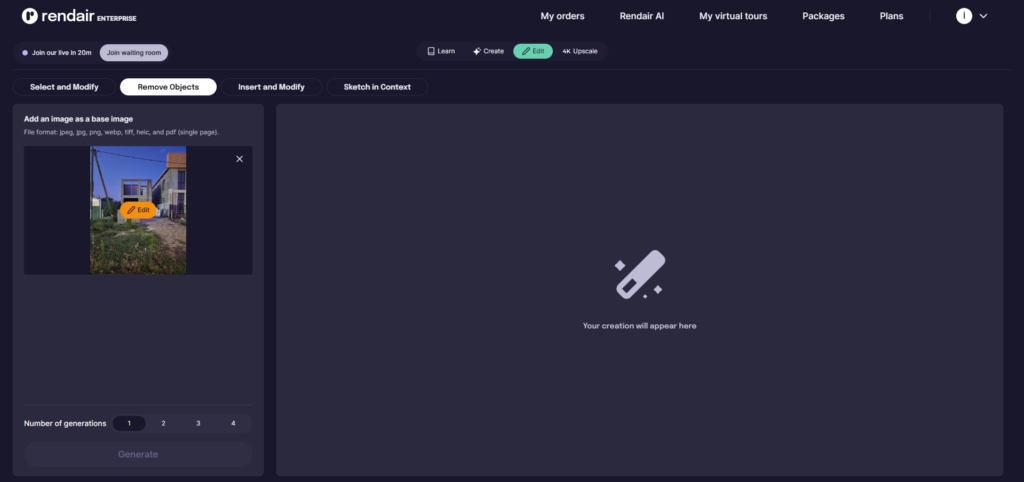
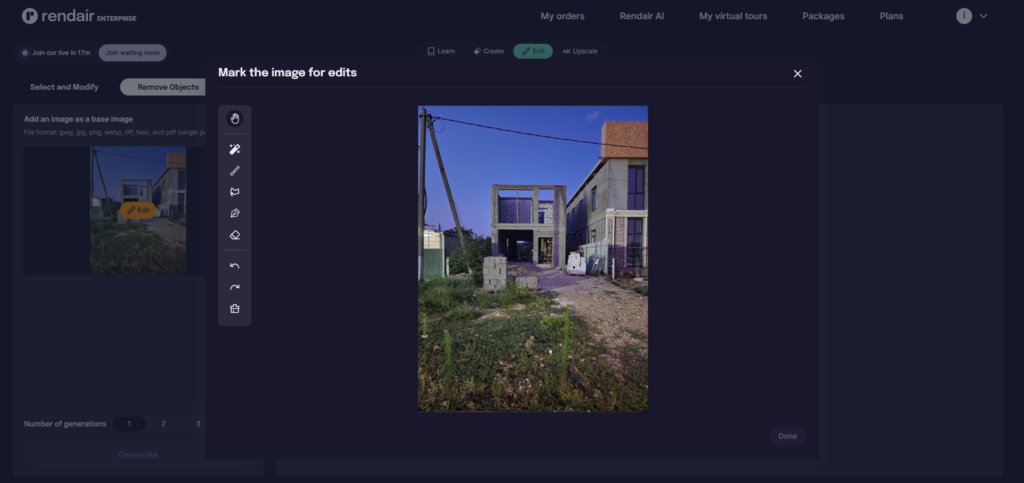
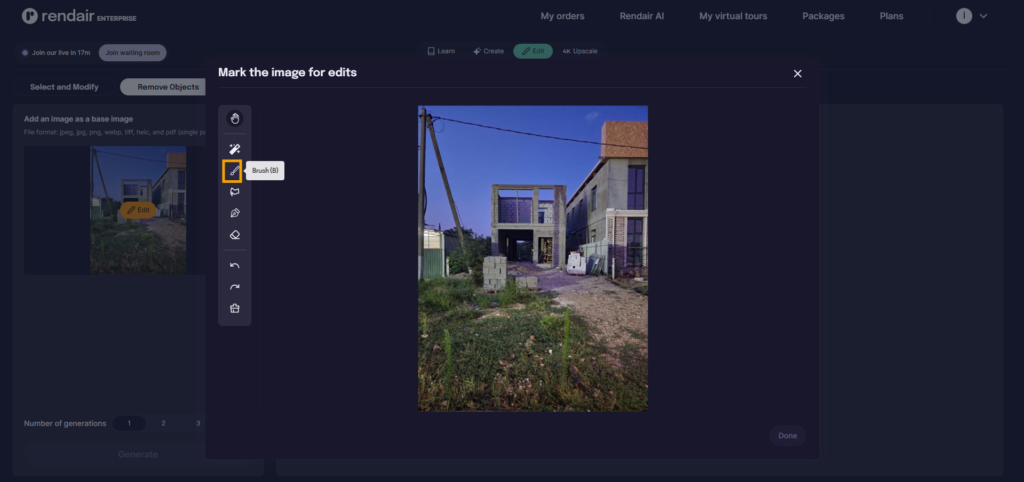
Once the image is uploaded, a pop-up will appear. Click the brush icon, then mask the objects you want to remove. In this example, I’ll mask construction materials. When you’re done, click Done.
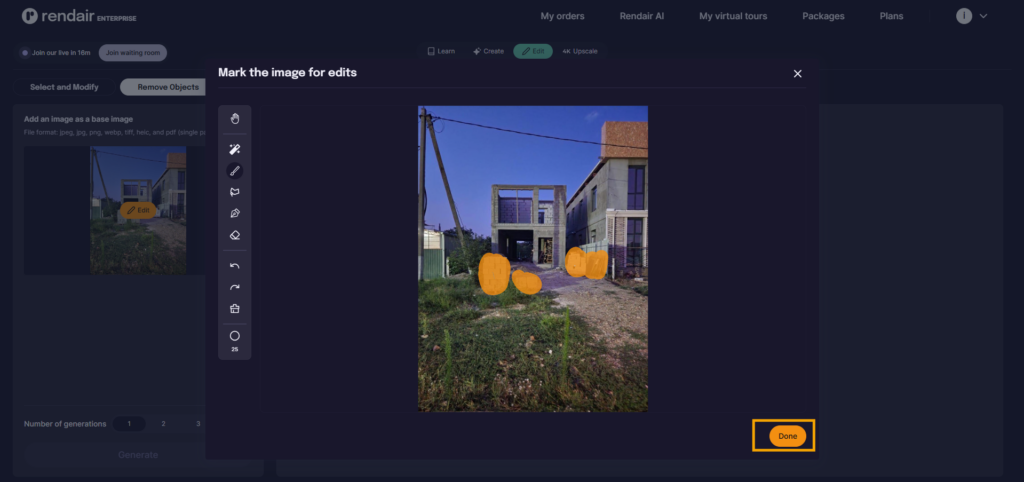
4- Hit Generate
Now, click Generate.
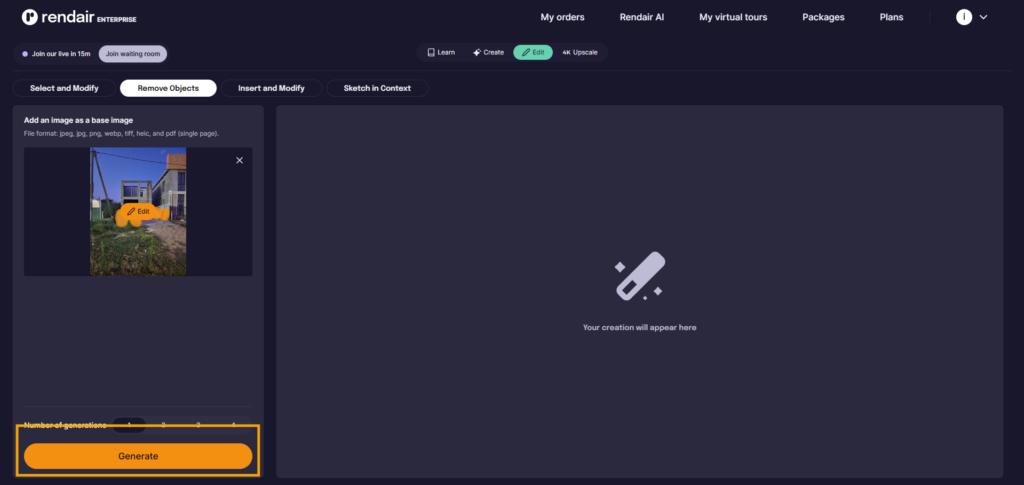
Voilà, we have a clean base image, ready for further edits.
5- Open Edit
At the top of the image, you’ll see several options. Click the pen icon to enter the Edit section.
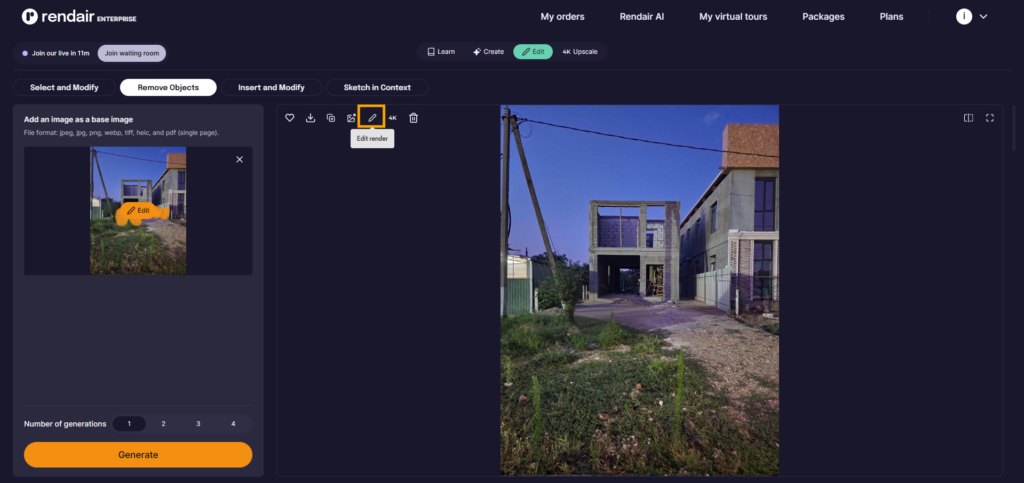
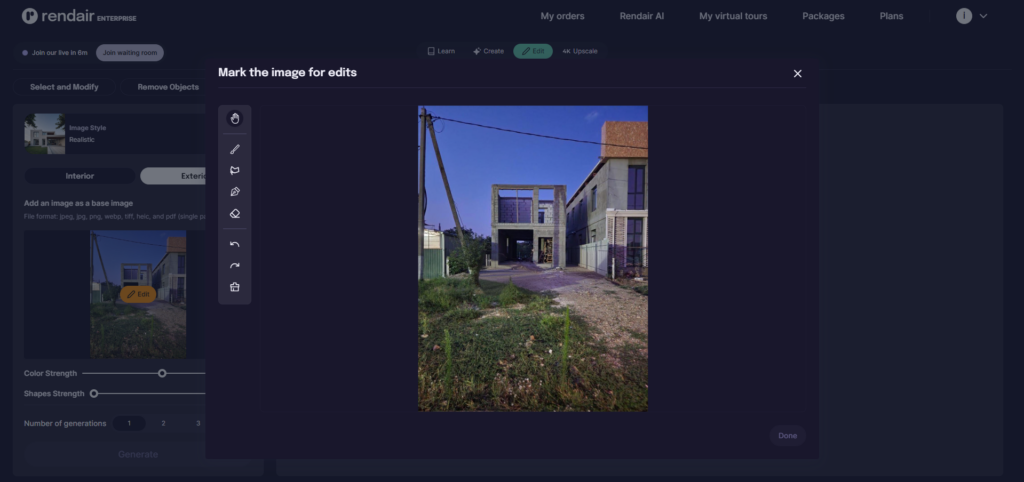
Select Sketch in Context, and a pop-up window will open.
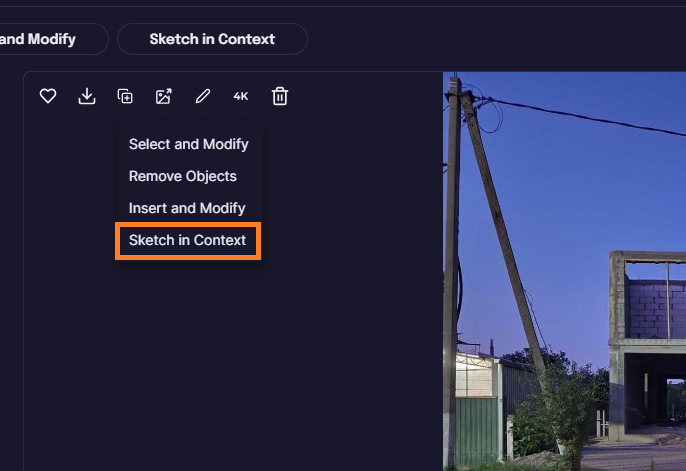
6- Sketch over the Image
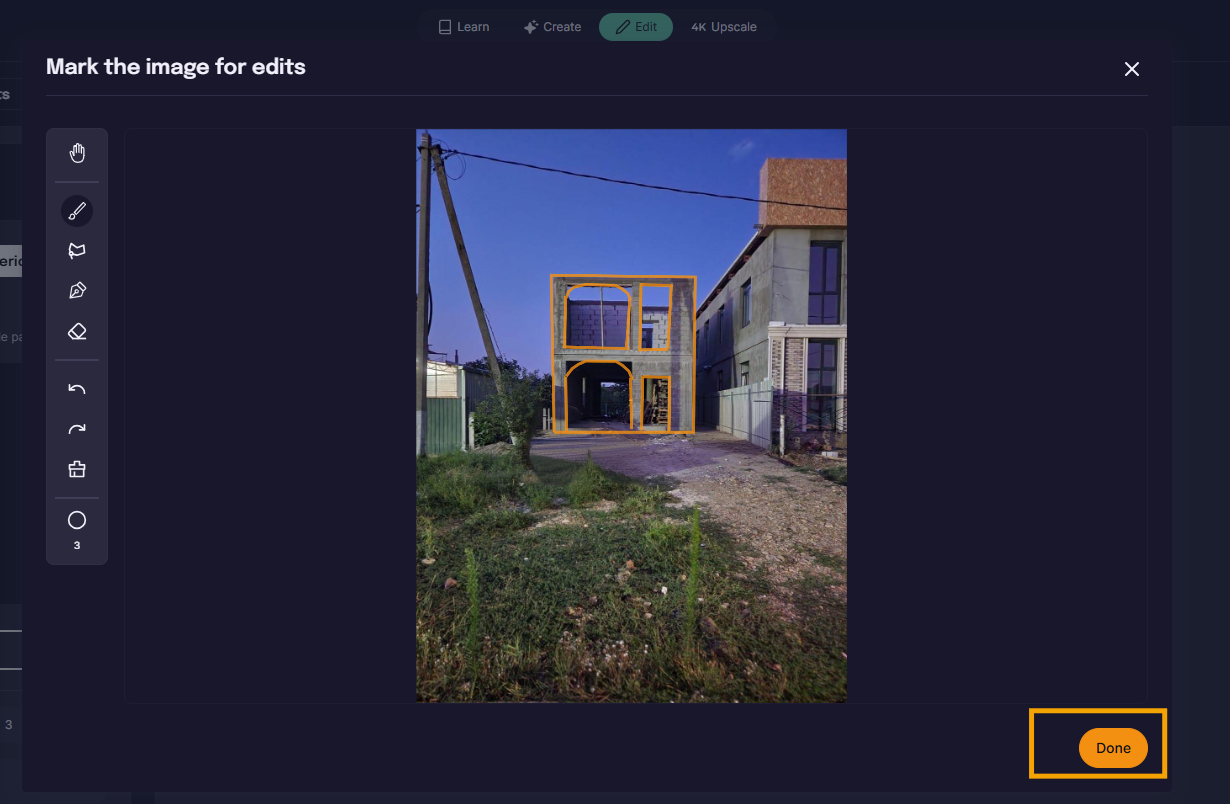
In this window, you can sketch directly onto the image. Choose a tool (brush, lasso, or pen) to make your sketch. I’ll use the pen to outline the building, making sure to include arched openings.
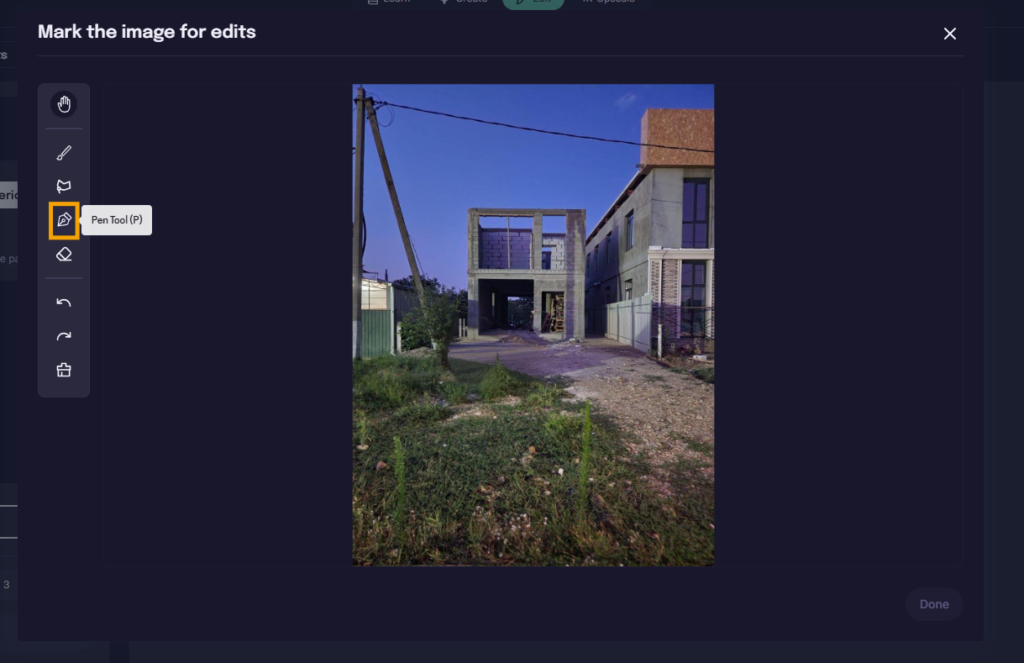
Once your sketch is complete, click Done.
7- Check the Selections
Let’s ensure the selections align with our goals.
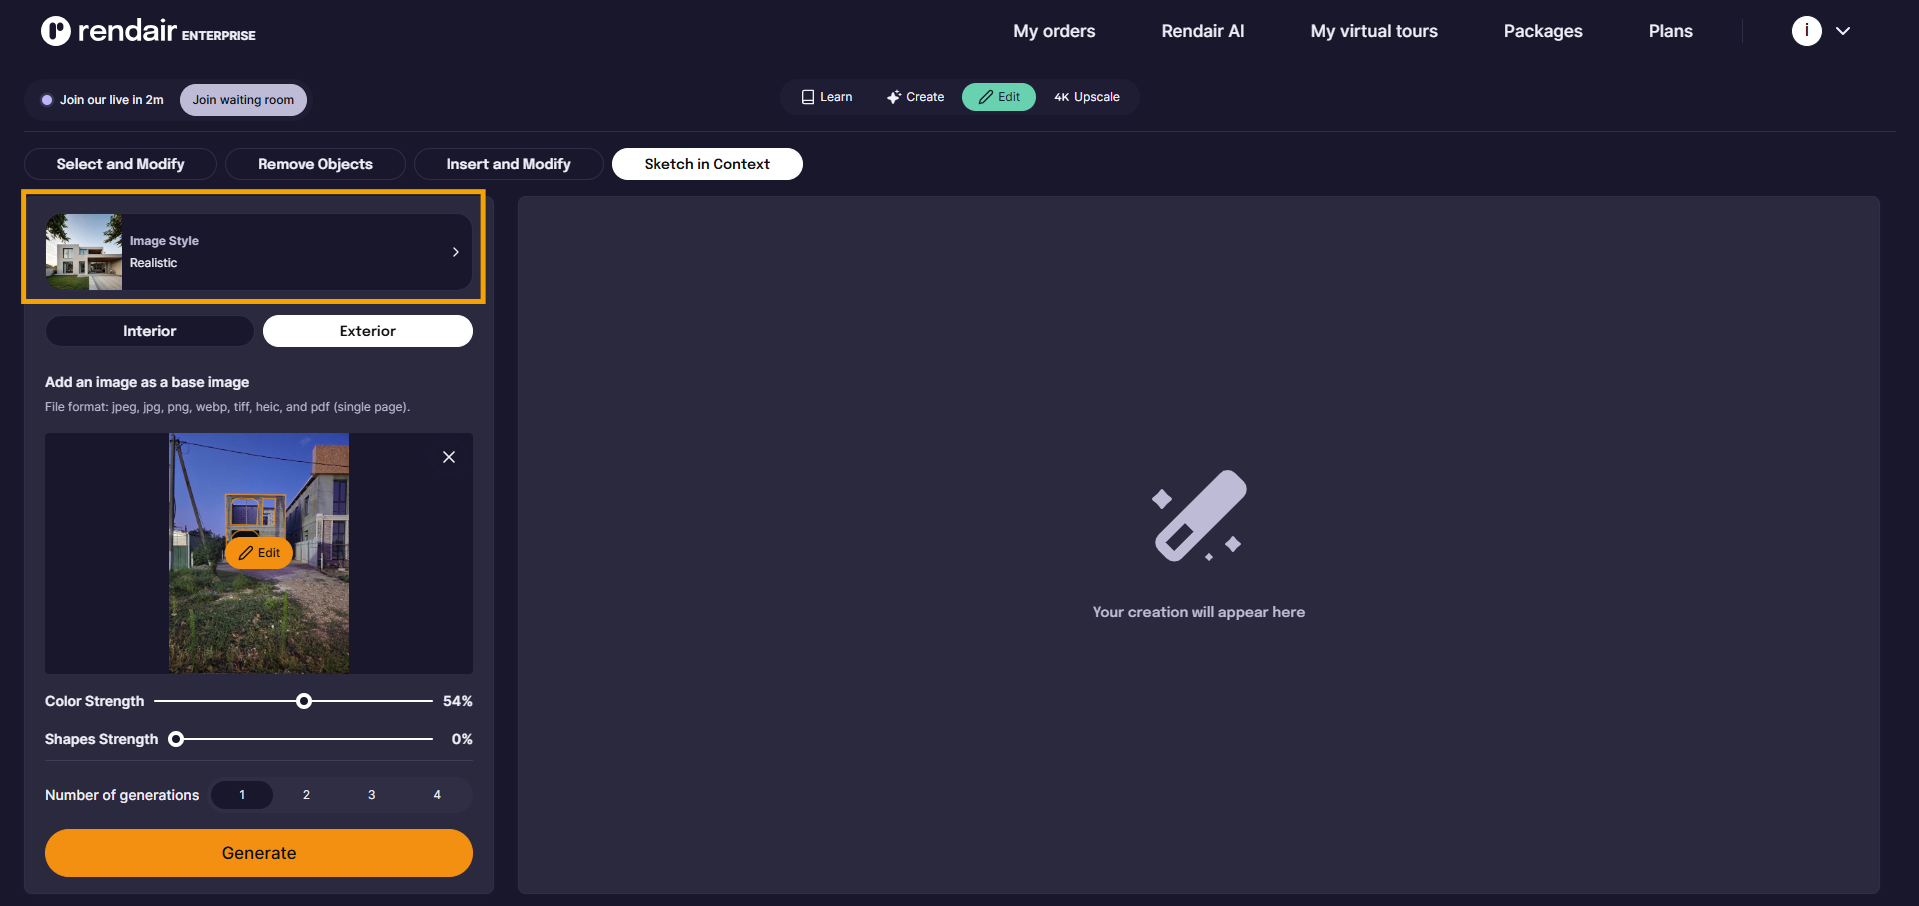
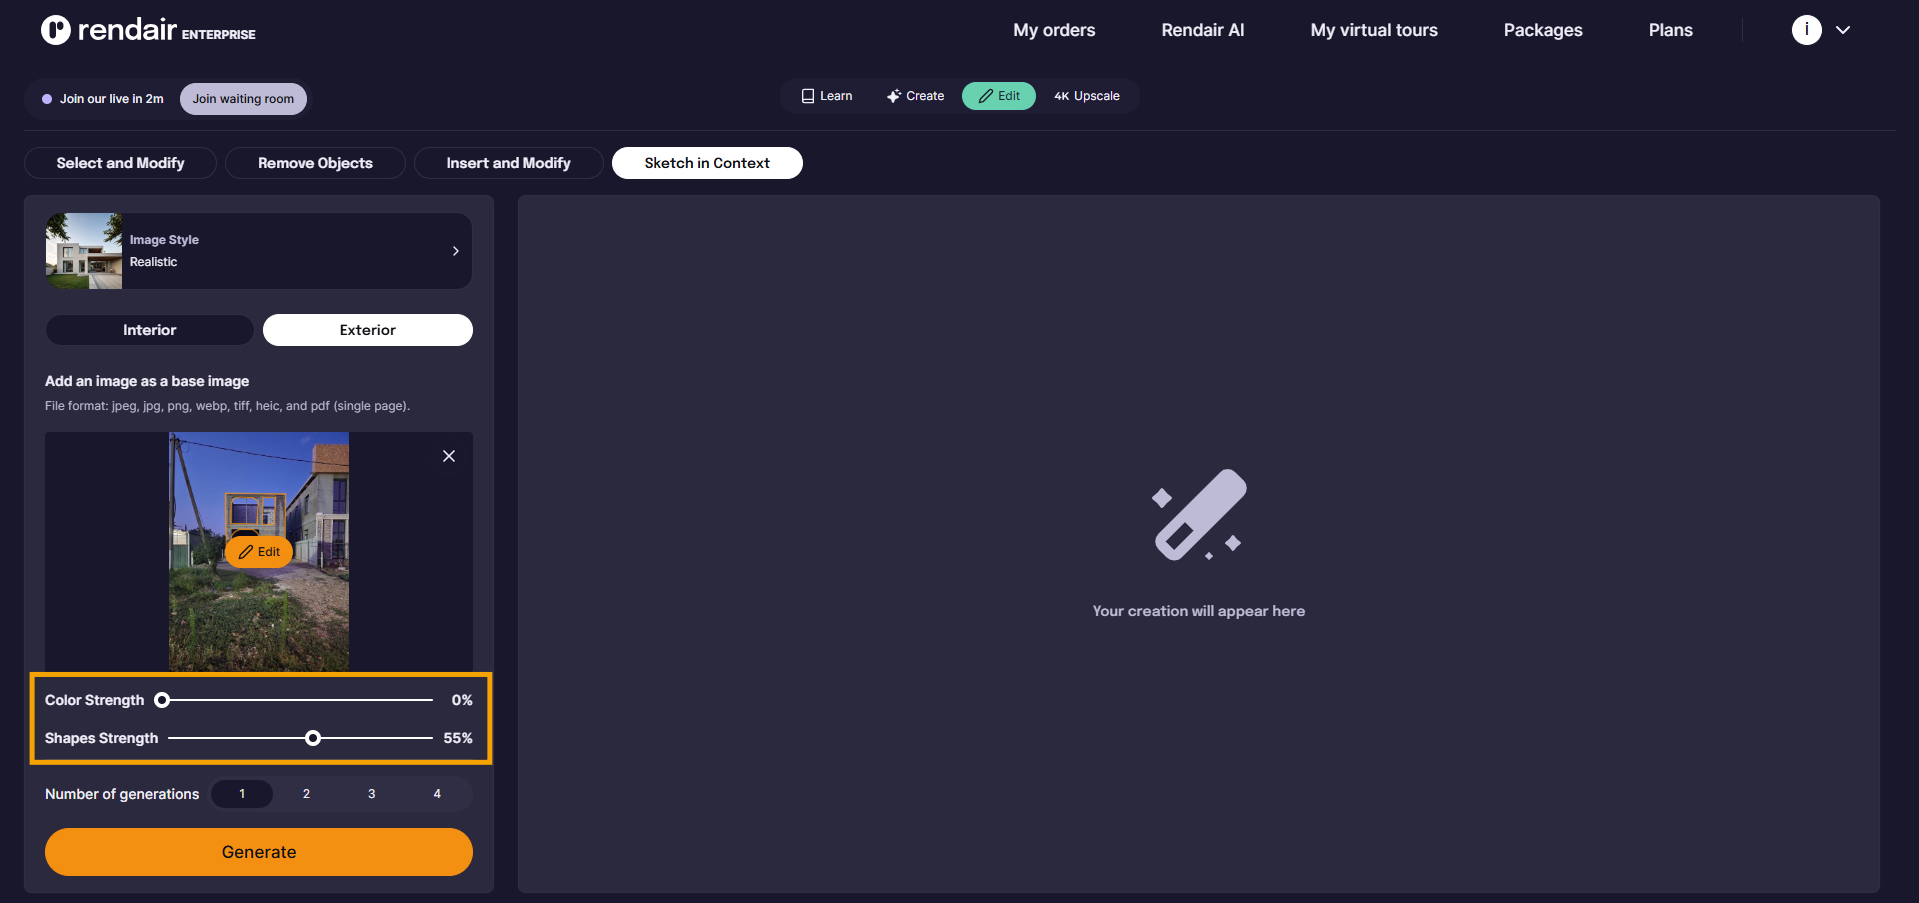
First, verify that the style is realistic. Since we’re working with a photo, realistic is ideal, but you can select other styles like illustration, sketch, or painting if you prefer an abstract look.
Next, choose Exterior for an outdoor scene or Interior if you’re working with an indoor image. I’ll select Exterior.

8- Adjust Parameters
There are two key parameters for the base image:
- Color Strength: Controls how closely the new image follows the color palette of the original. Set it high to retain similar colors.
- Shape Strength: Dictates how closely the new image adheres to the shapes in the base image. Set it to 100 to keep the shapes unchanged, or lower it if you want more flexibility.
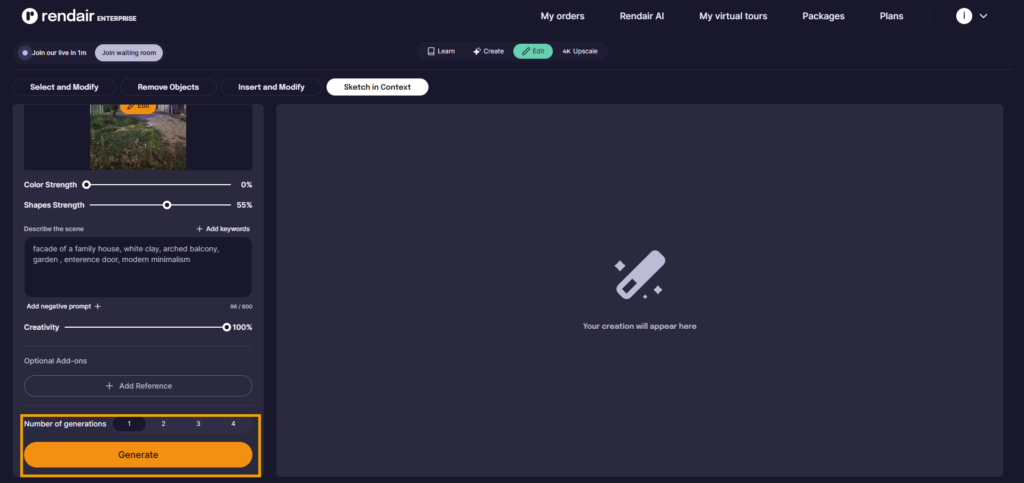
In this case, I want the AI to follow my sketch loosely for some creative freedom, so I’ll set Shape Strength around 55.
9- Add a Prompt
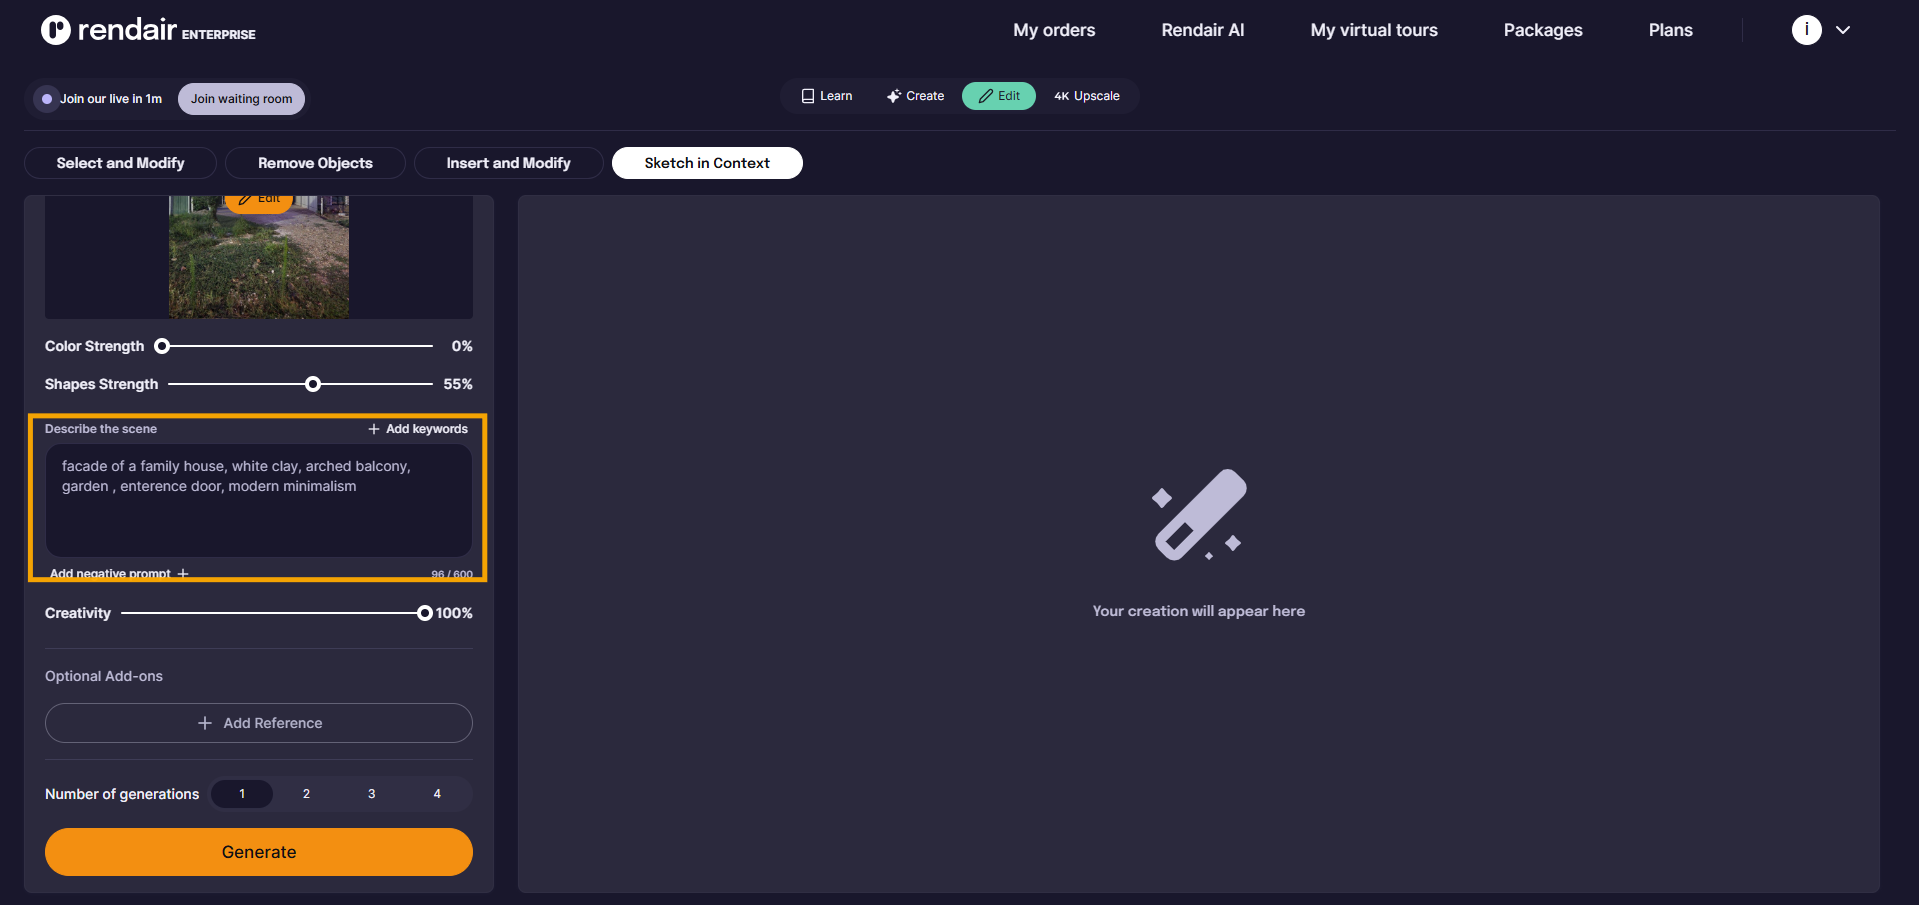
Now, let’s add a prompt, keeping it as simple as possible and focused on the specific changes you want.
Since I want to replace the coffee table, here’s my prompt:
Facade of a family house, white clay, arched balcony, garden, entrance door, modern minimalism
10- Set Creativity
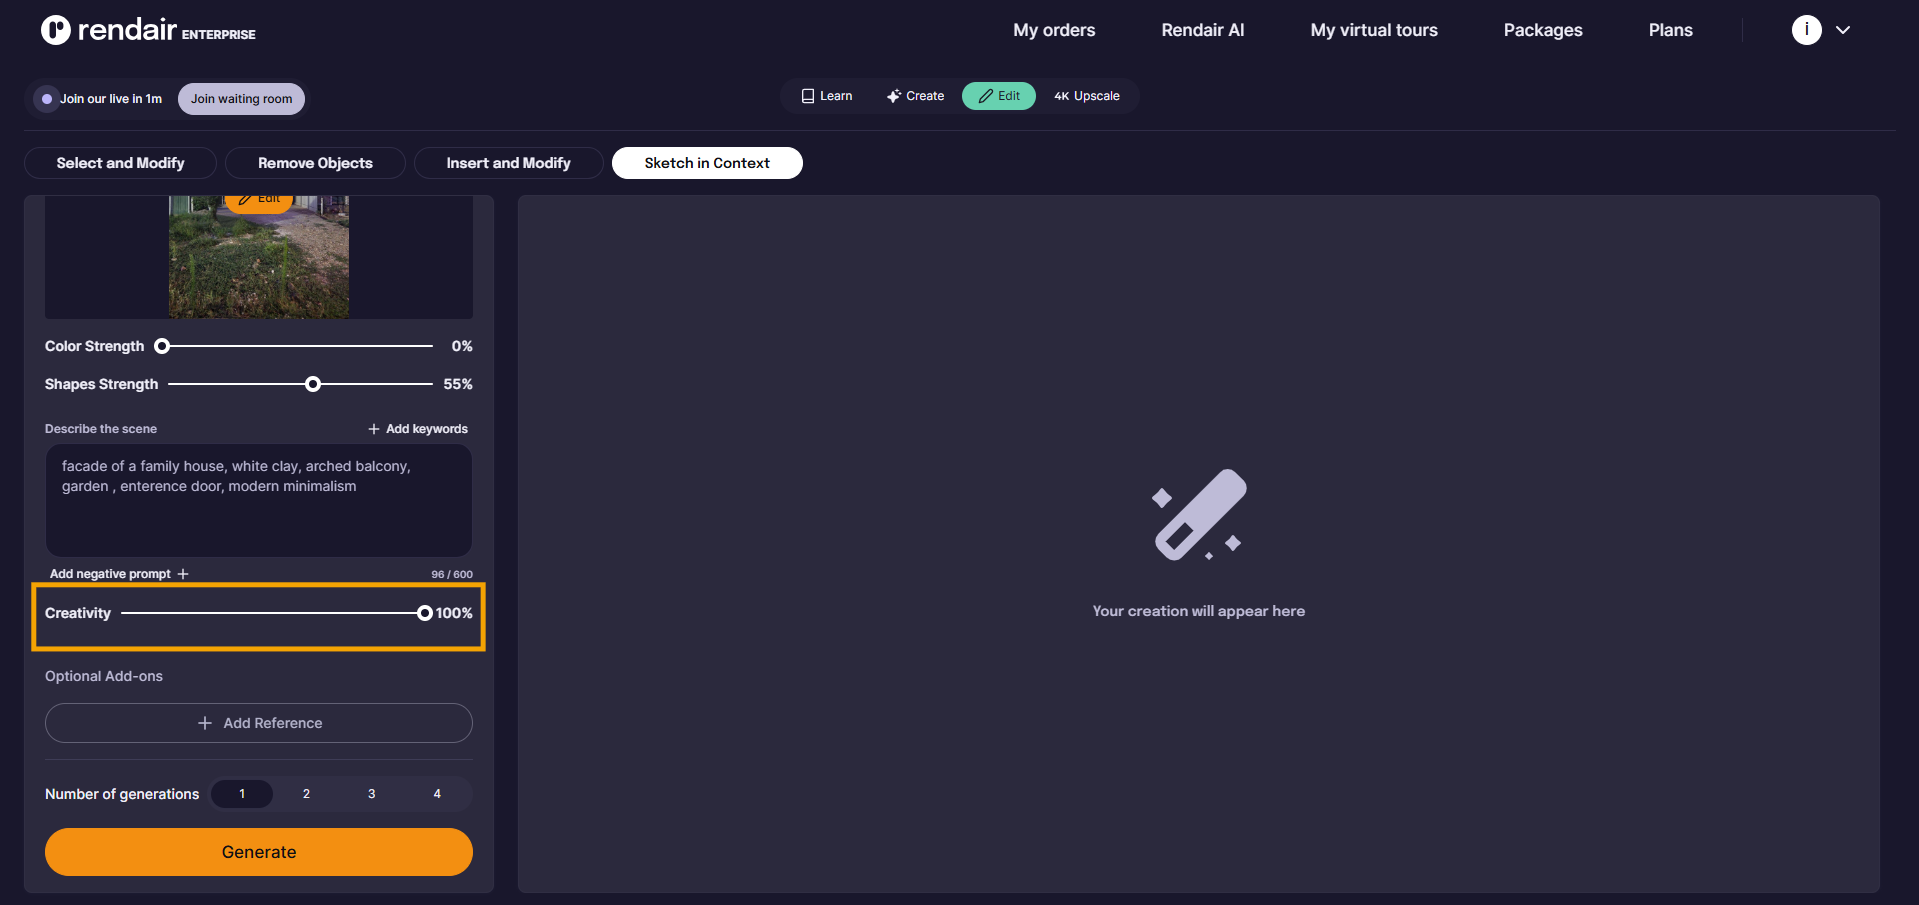
Adjust the Creativity parameter to guide how imaginative the AI should be.
- A low value means “stay close to my prompt without added elements.”
- A high value means “interpret my prompt creatively.”
I’ll set Creativity to around 100%.
11- Add a Reference Image
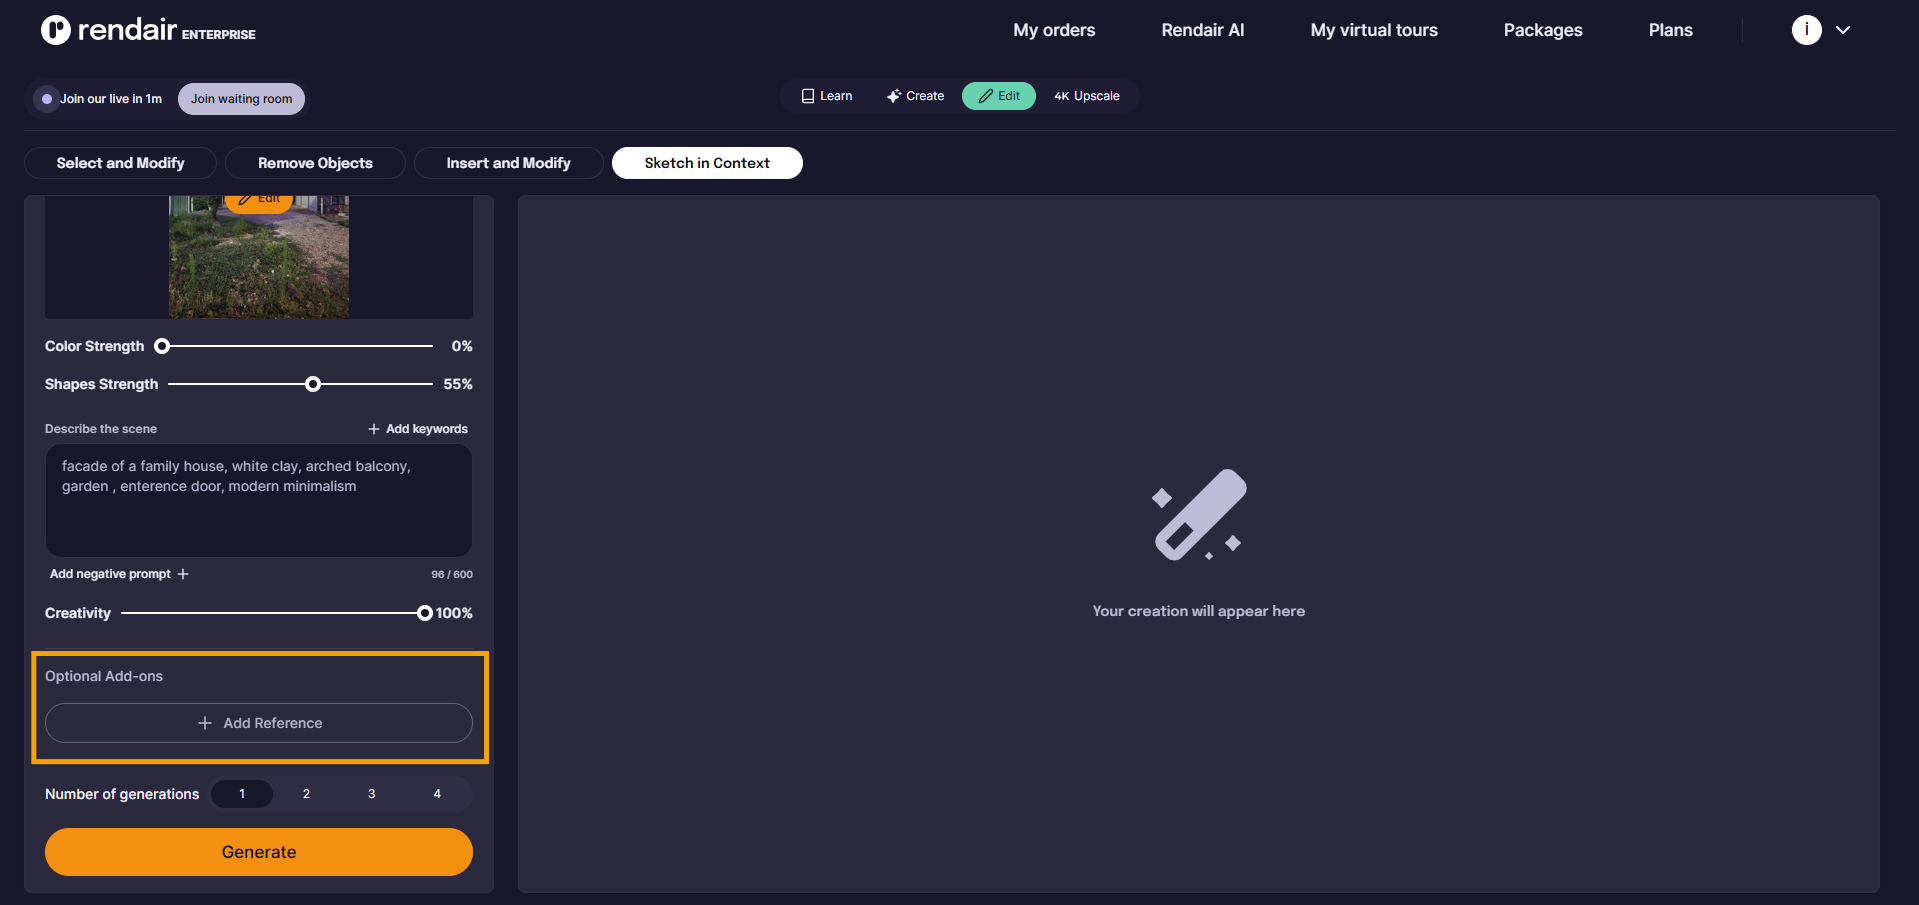
If you have a reference image that reflects the style or materials you’re aiming for, you can add it here. Just drag and drop the image or click +Add Image to upload it.
12- Hit Generate
We’re ready to create our first image! Click Generate:
Here’s our initial result.
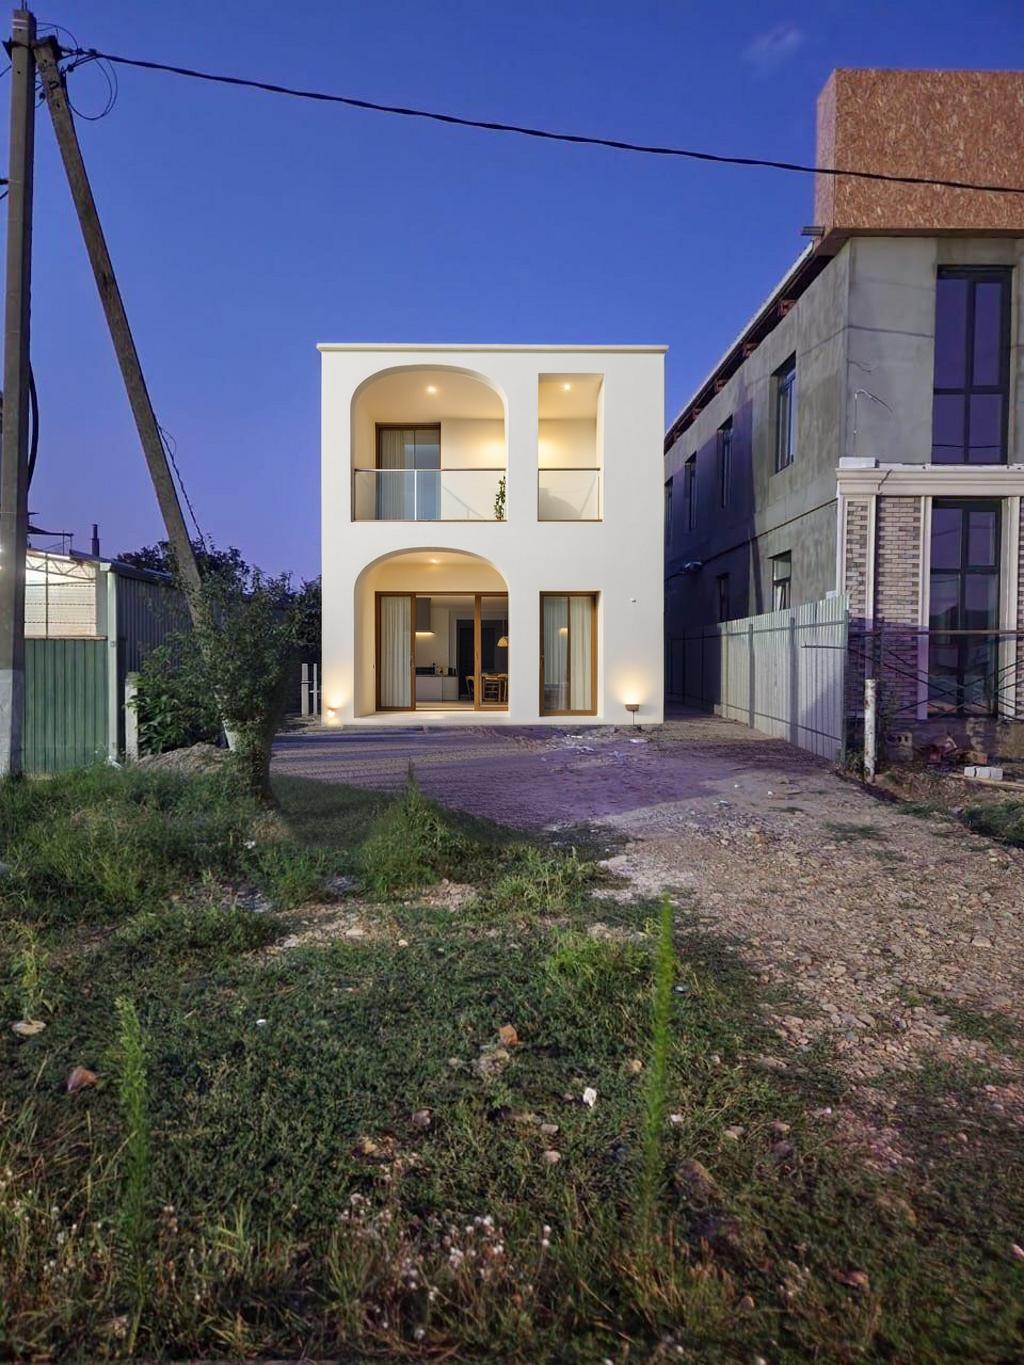
You can generate variations until you’re satisfied, adjusting parameters as needed to explore different design options.
13- Edit Further
Once you have a design you like, you can continue refining it. Click the pen icon to enter the Edit section again.
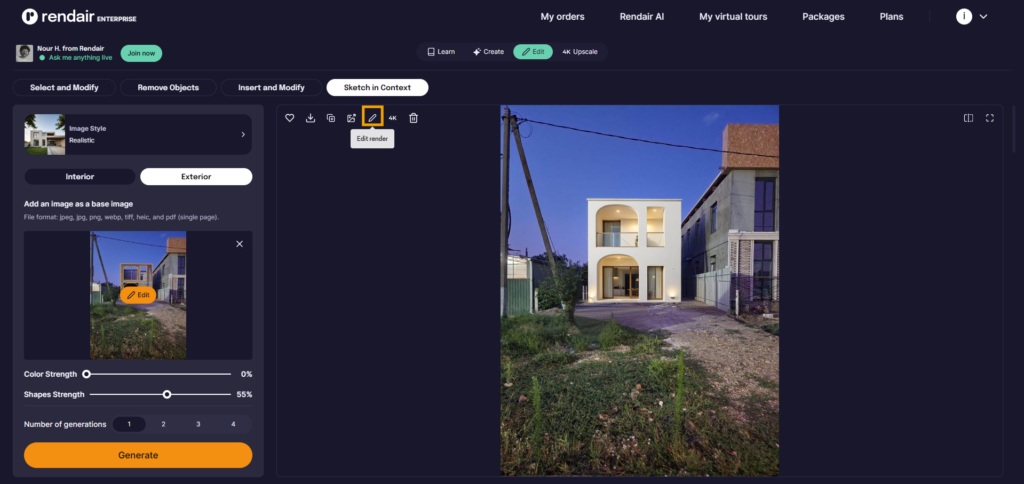
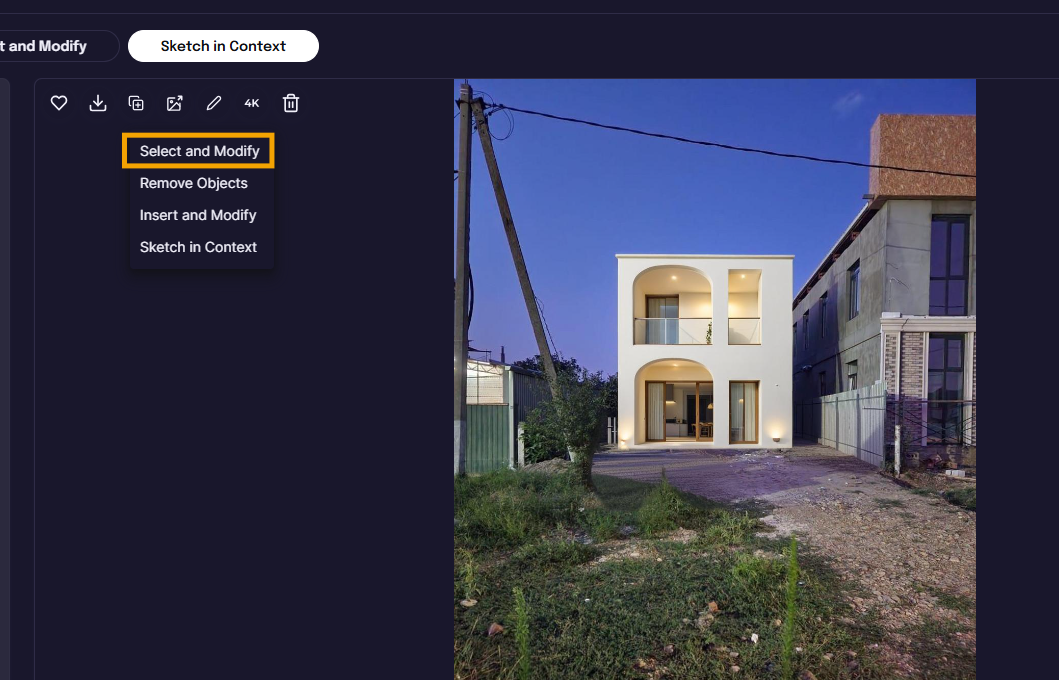
This time, select Select and Modify. A familiar pop-up will appear.
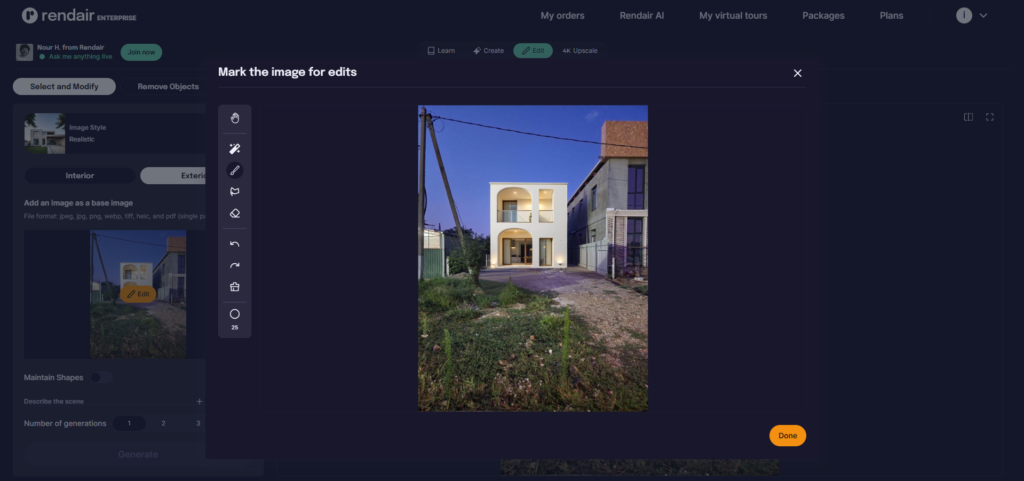
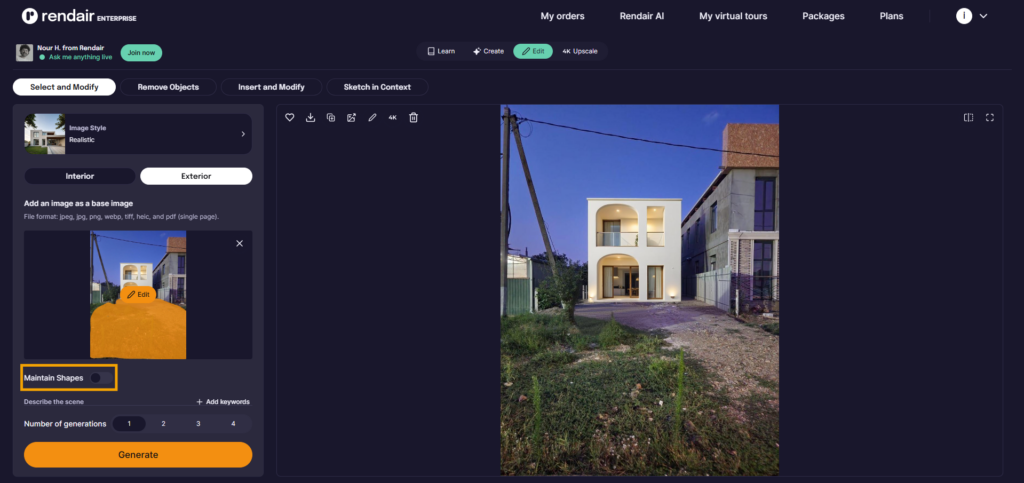
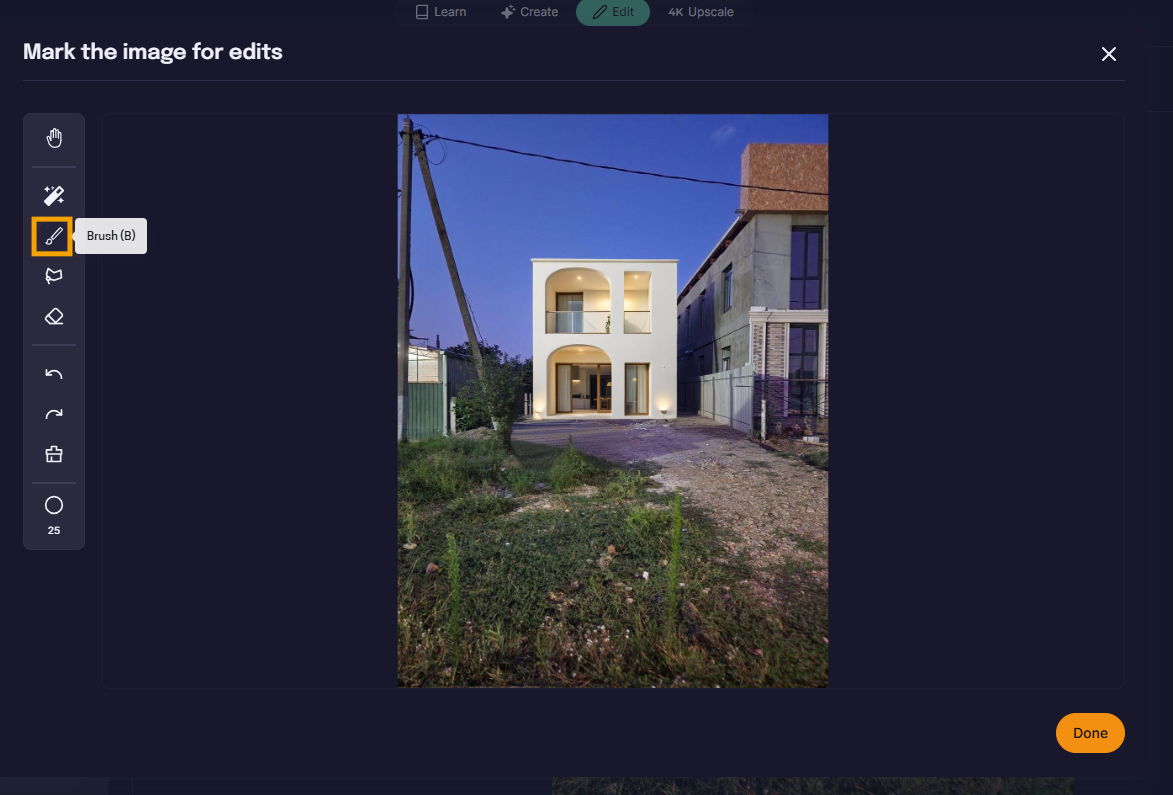
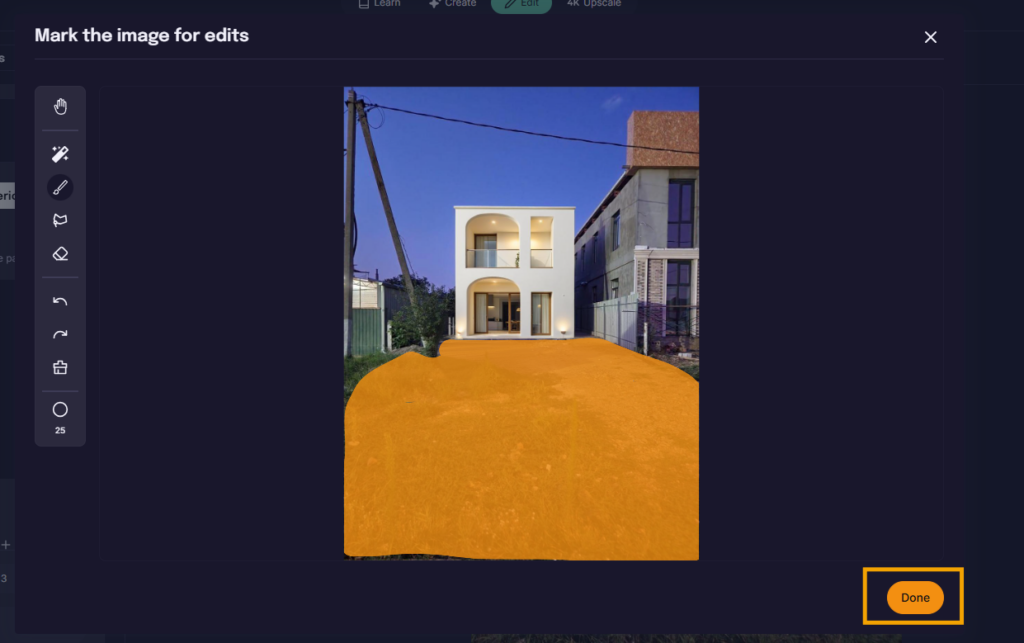
Choose the brush and adjust its size to mask the area you want to modify. For example, I’ll mask the front area to design a garden. (You can also use the magic wand or Polygonal Lasso tools for precise selection.)
When you’re done masking, click Done.
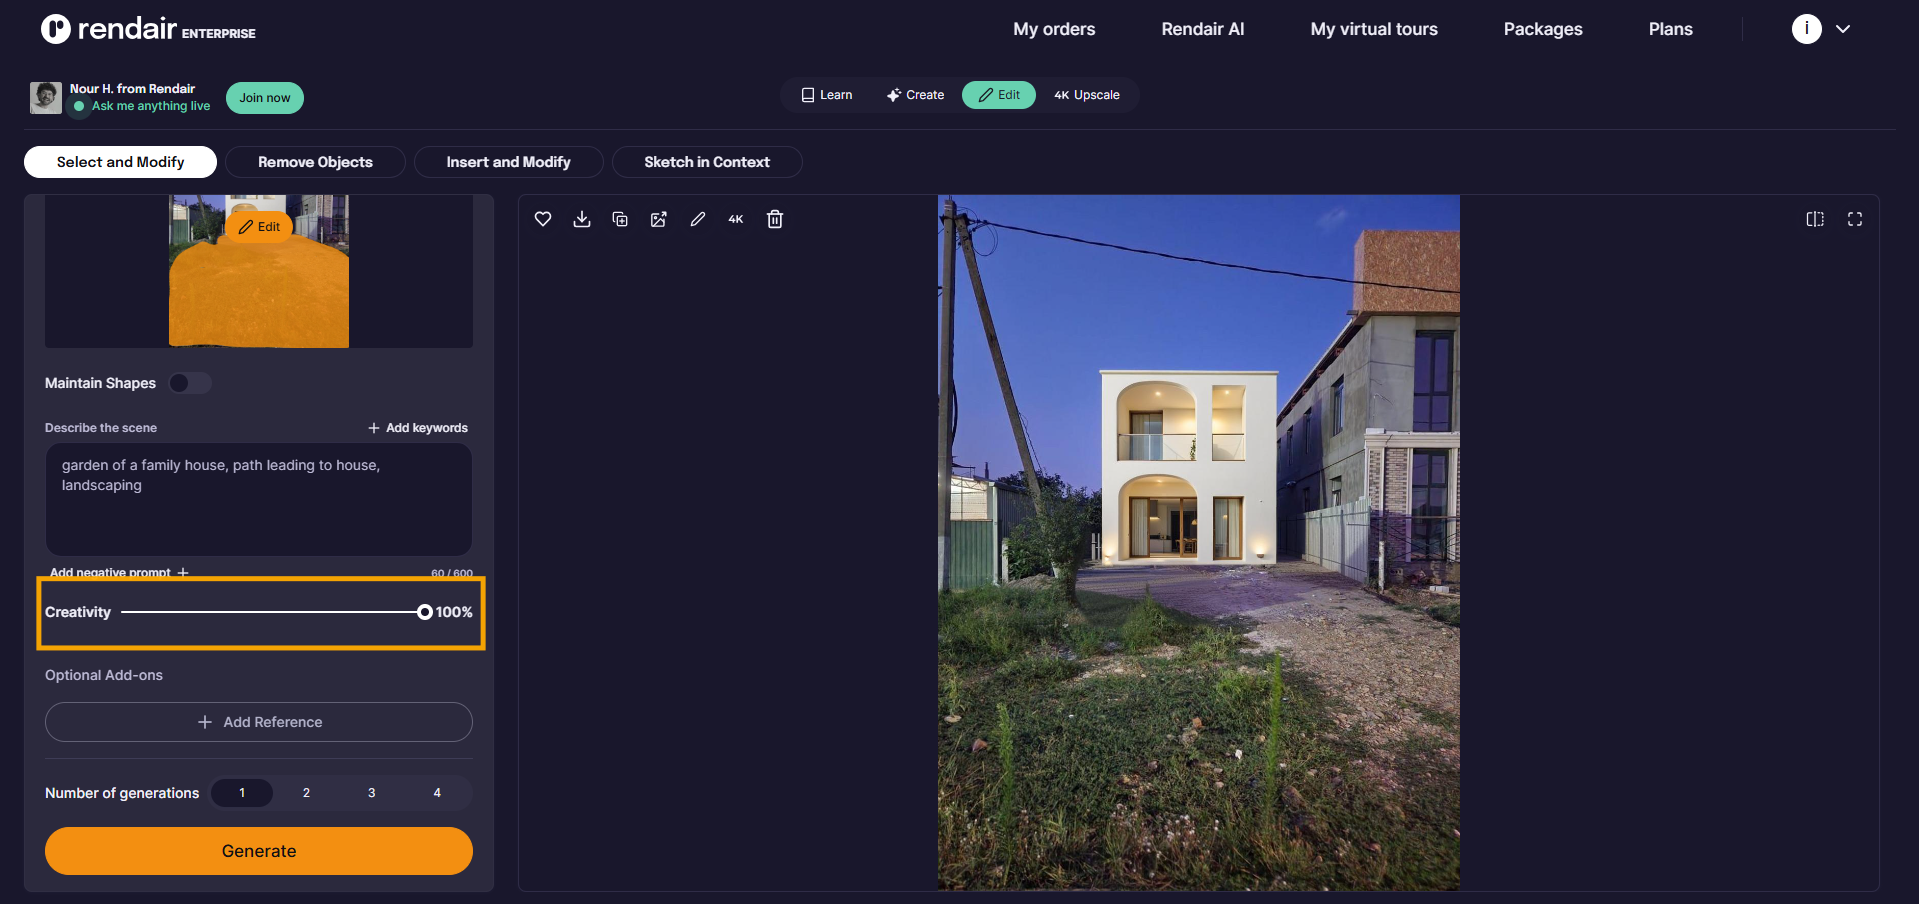
In this case, I’ll leave Maintain Shape unchecked because I want more flexibility. If you want to keep specific elements, adjust the slider accordingly.
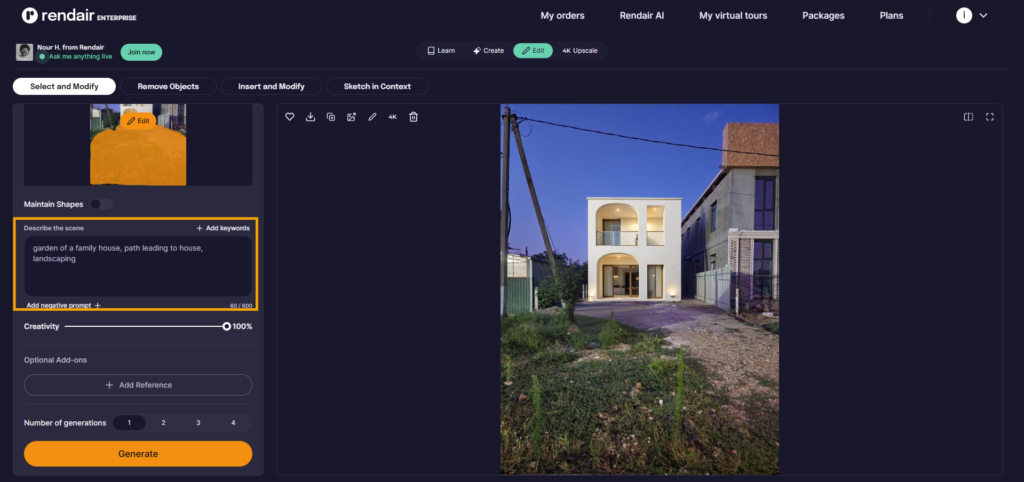
14- Prompt for the New Design
Describe the changes for the selected area. Here’s my prompt for a garden:
Garden of a family house, path leading to the house, landscaping
I’ll keep Creativity at 100% and then click Generate!
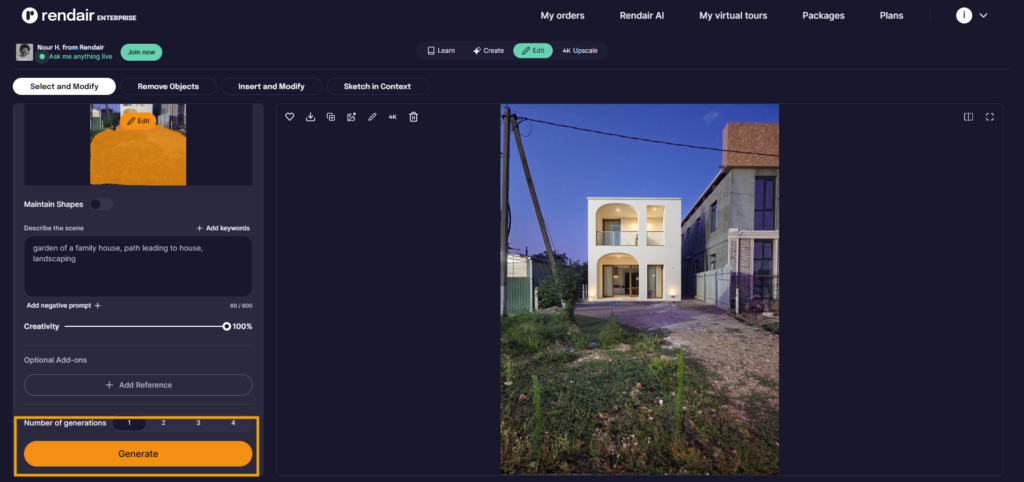
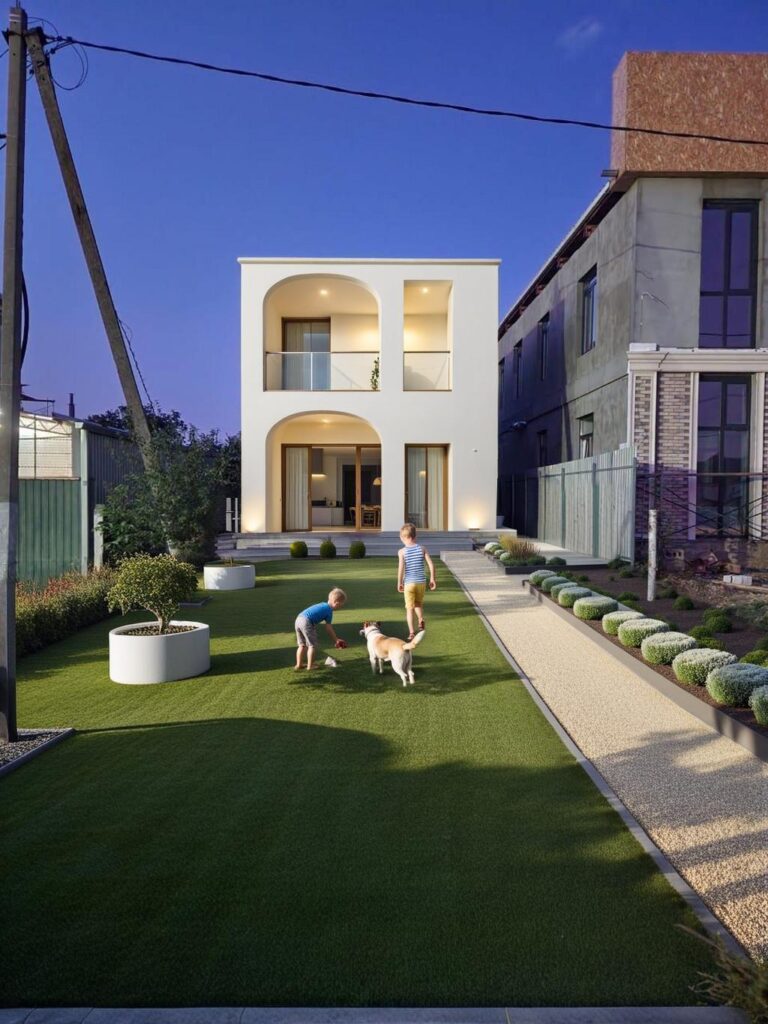
Here’s the final design:
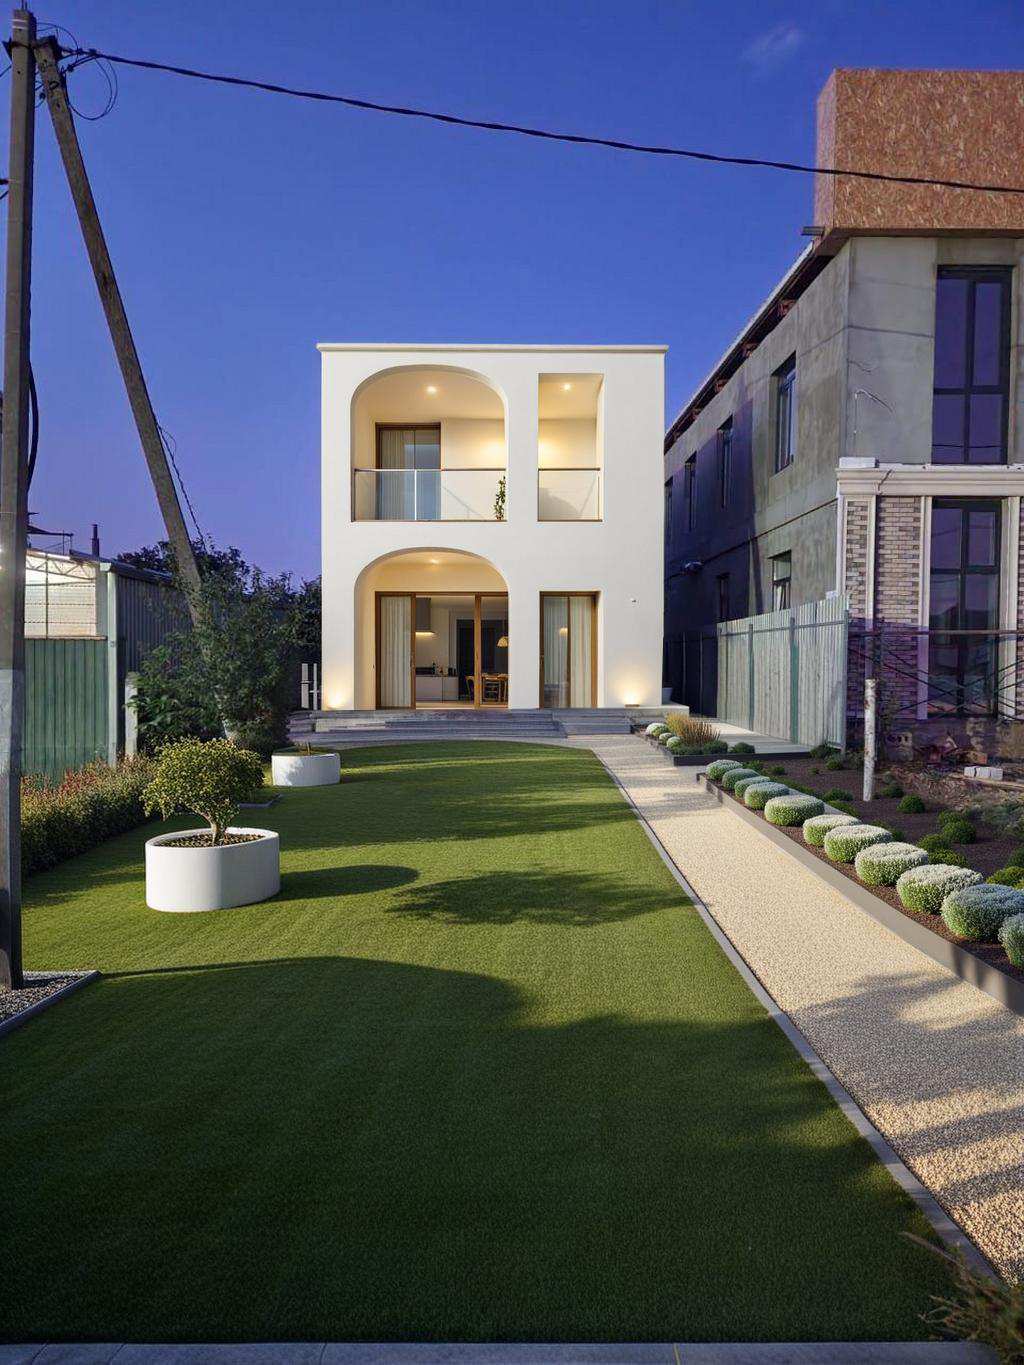
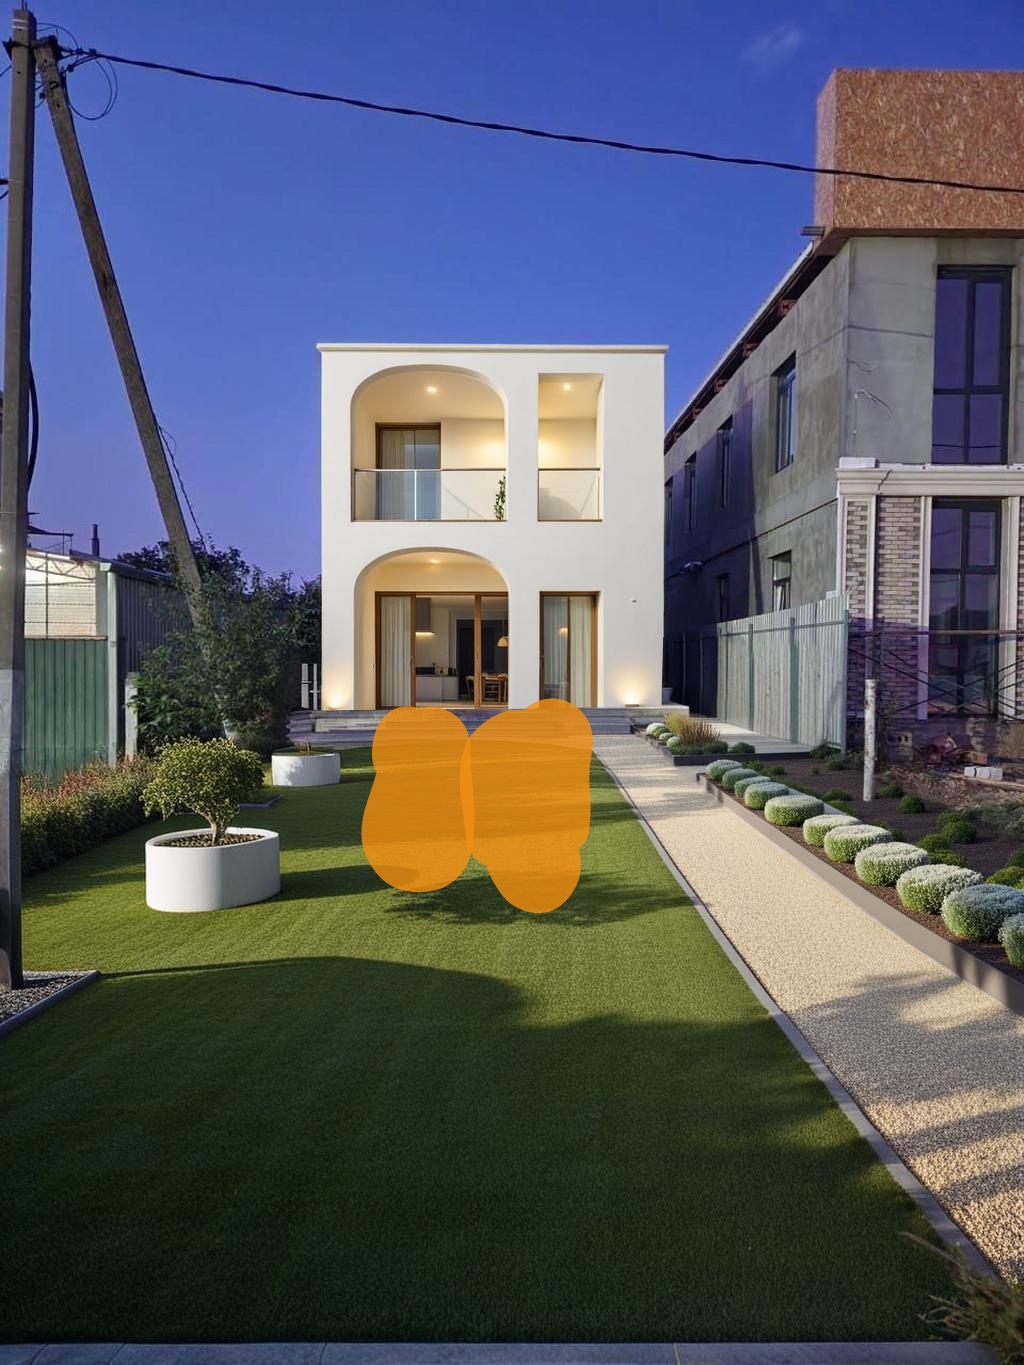
You can make additional edits to other parts of the image by selecting Select and Modify and following the same steps.
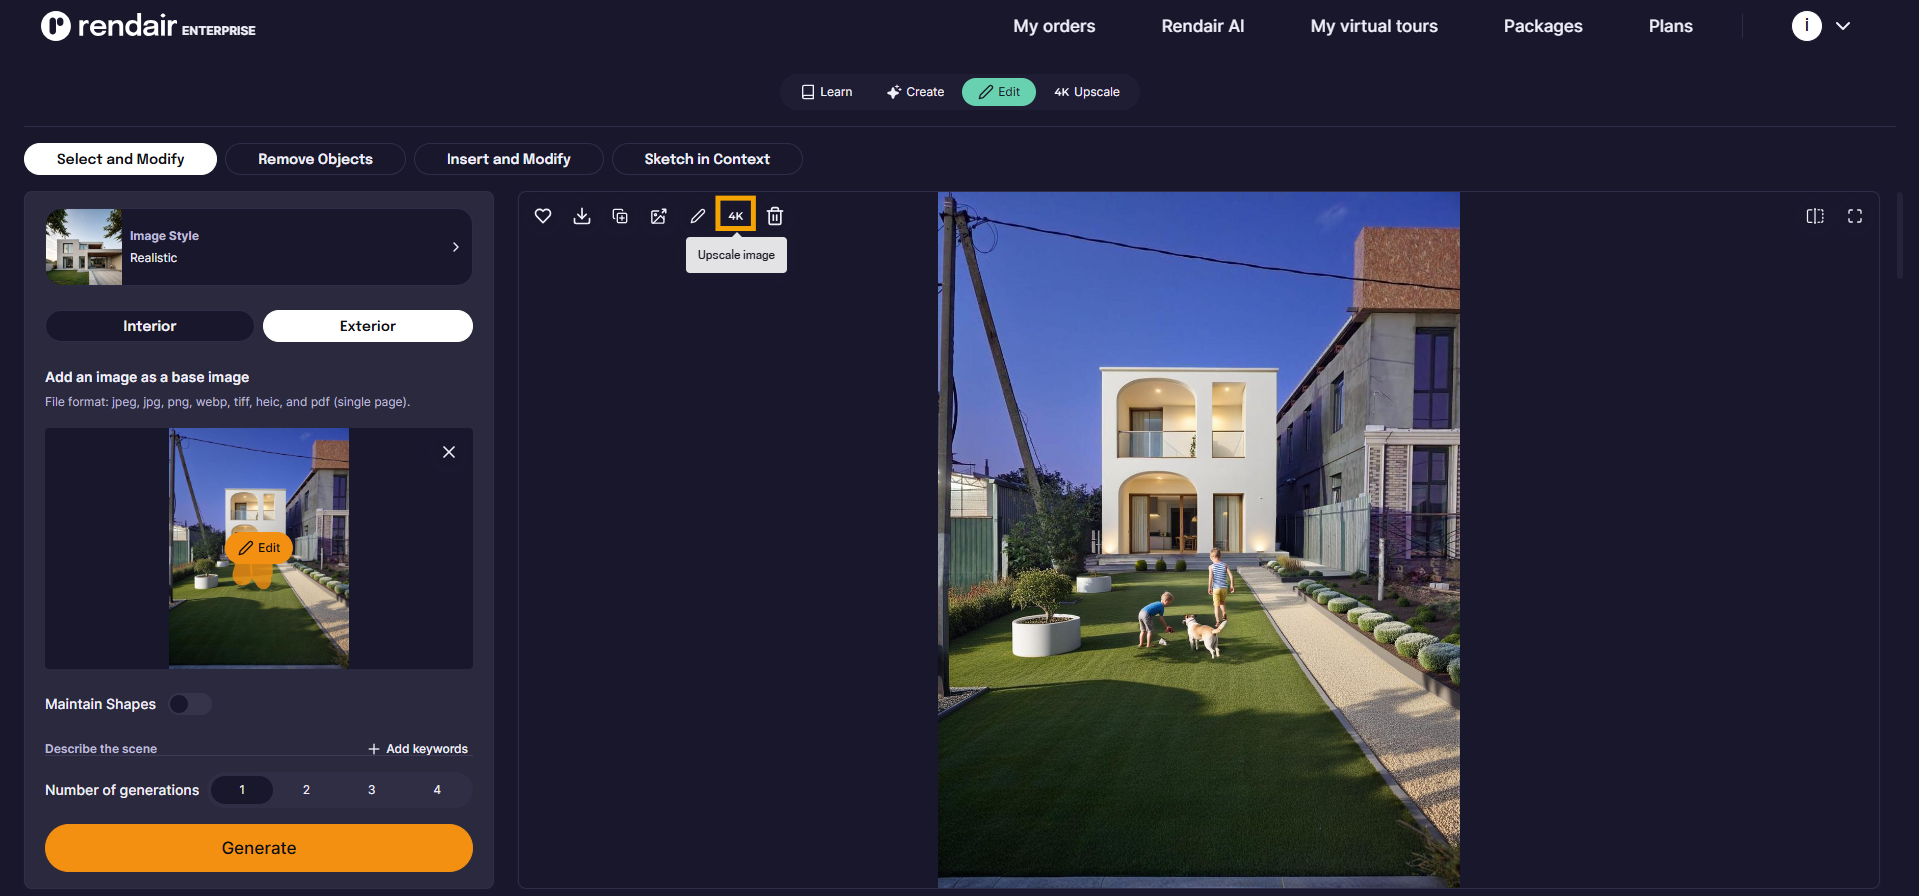
15- Upscale
Finally,
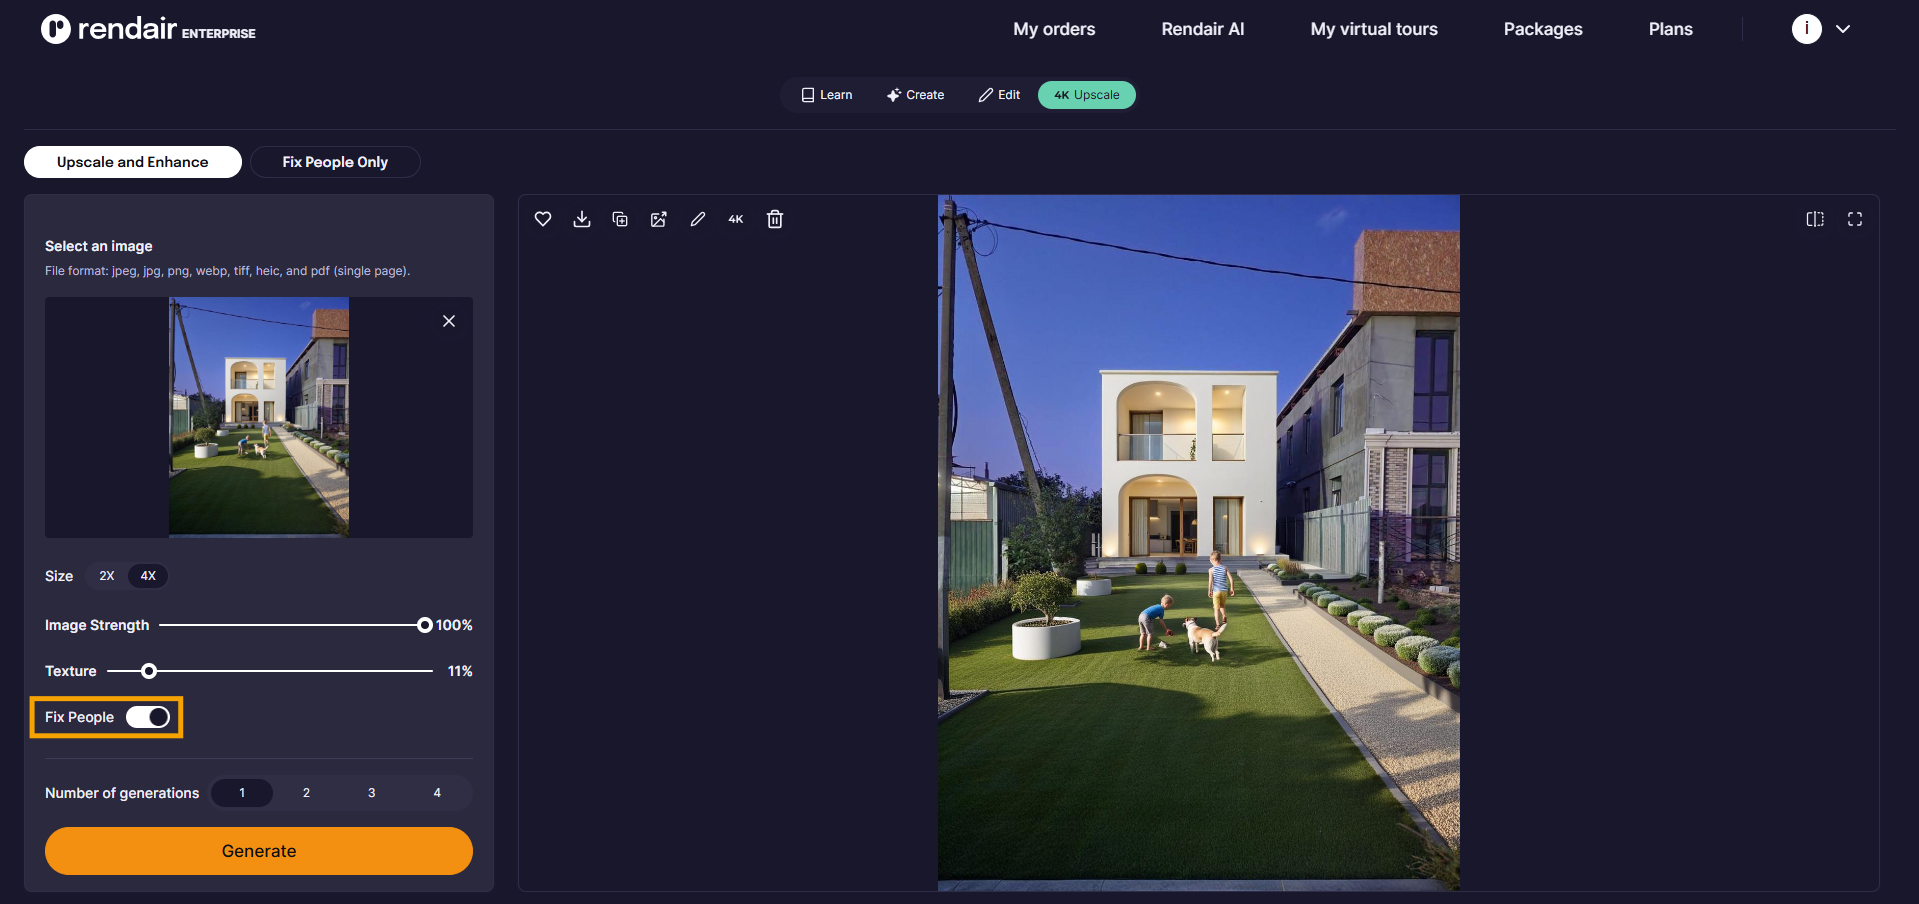
In this final step, we’ll upscale the image, refining its resolution and final touches. Click the 4K symbol over the image. And click Upscale and Enhance option.
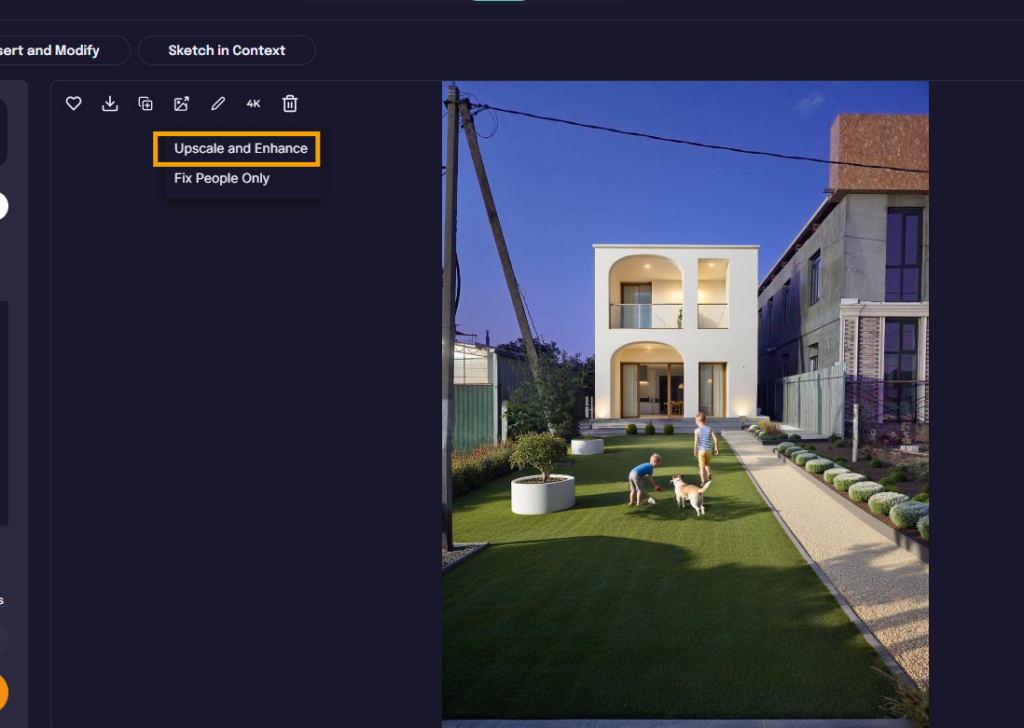
Choose the Size
Start by selecting your desired resolution. You can choose between 2K and 4K. For this example, I’ll go with 4K.
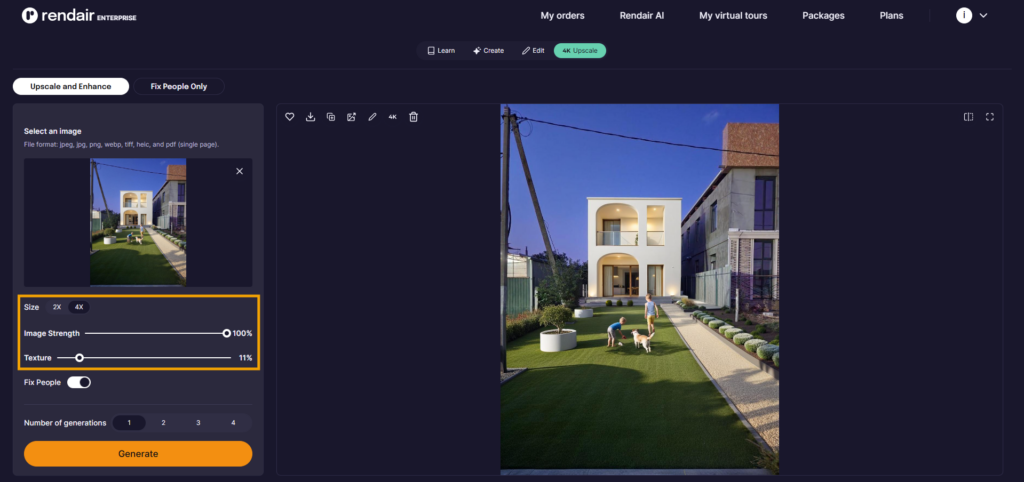
Adjust Parameters
Two key parameters help fine-tune the upscale:
- Image Strength: Controls how closely the AI follows the original image. I’ll set this to 100, to not change any details on the image.
- Texture: Adjusts the level of texture detail. I’ll keep this at a lower setting, around 15, for a smooth finish.
Fix People
If your image contains human figures, enable the Fix People option for more accurate detailing. Since my image has kids playing, I’ll turn this on. If yours has none, you can leave it disabled.
Generate
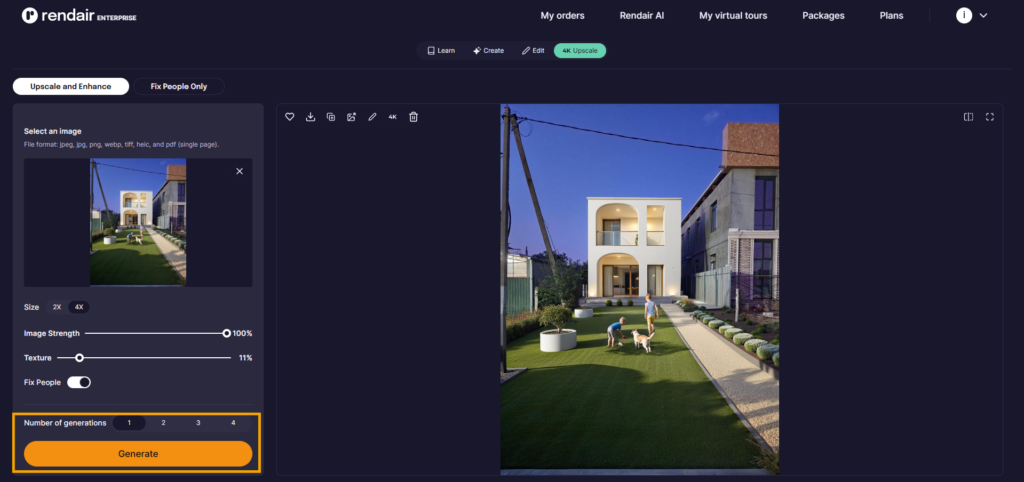
Finally, click Generate to complete the upscale and get your high-resolution image.
Your upscaled image is now ready for final review!
